
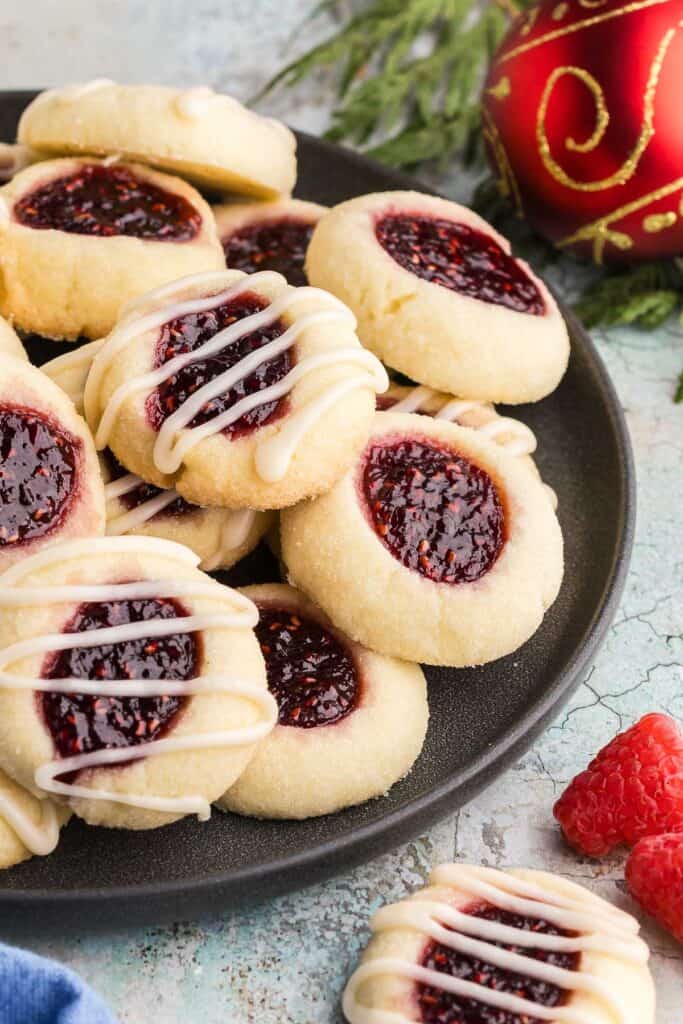
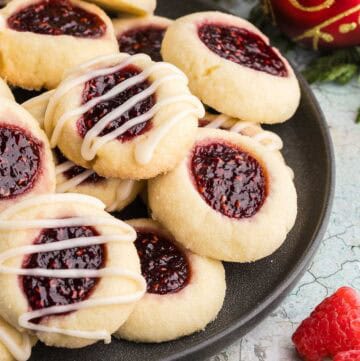
Raspberry thumbprint cookies are the kind of treat that always feels homemade and heartfelt. The buttery dough is soft and easy to work with, and filling each little thumbprint with ruby-red raspberry jam makes them as pretty as they are delicious. They bake up tender and slightly golden, with that perfect balance of sweet jam and buttery crumb. A simple, timeless cookie that’s lovely for holidays or any day you want a little comfort.
My mom used to make thumbprint cookies around the holidays, so they have always meant “Christmas” to me – but honestly, they’re lovely any time of year. I think they’d be especially pretty for Valentine’s Day if you used something heart-shaped to make the indent instead of your thumb. Or maybe I’ll try using a fingertip to press two angled imprints and see if I can make little “Heart Print Cookies”. Let me get back to you on that one!
If gifting homemade holiday cheer is up your alley, consider adding these Raspberry Thumbprint Cookies to a Holiday Cookies Gift Box. My post goes over how to do this from start to finish. Other holiday cookies you might enjoy include:
- Christmas Sugar Cookies
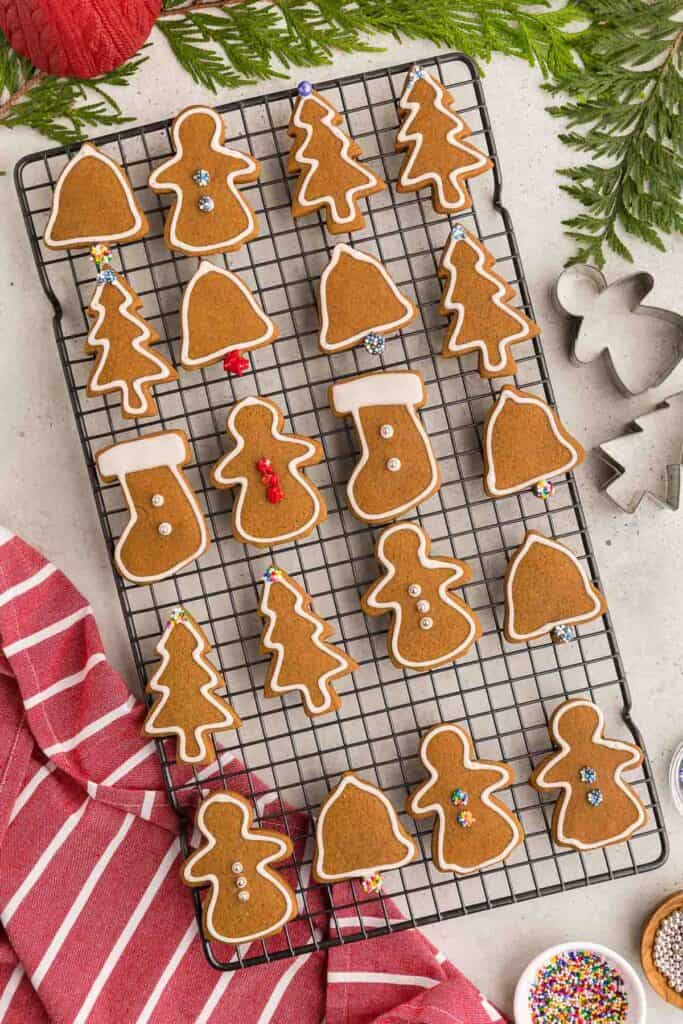
- Gingerbread Cookies
- Christmas Tree Meringues
- Almond Roca or Buttercrunch
- Chocolate Peppermint Cookies
- Almond Bark
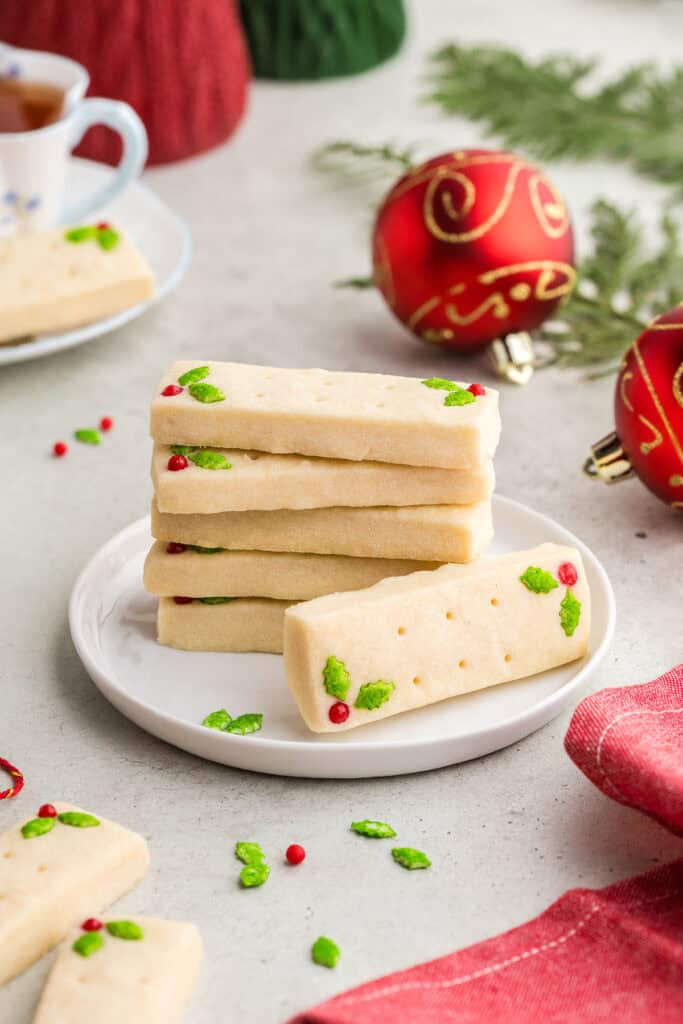
- Shortbread Cookies
Why You Will Love These Thumbprint Cookies
- Easy to make: This classic raspberry thumbprint cookie recipe comes together quickly with simple ingredients.
- Soft, buttery texture: Each bite melts in your mouth with that rich shortbread flavor everyone loves.
- Burst of raspberry flavor: Sweet and slightly tart jam adds the perfect pop of fruity goodness.
- Beautiful presentation: The ruby-red centers make these cookies look festive and bakery-worthy.
- Perfect for any occasion: A favorite at Christmas, Valentines Day, or anytime you crave a buttery jam cookie.
- Freezer and make ahead friendly: Bake now, freeze for later, or prep the dough ahead for easy holiday baking.
Equipment Needed
Disclosure: as an Amazon affiliate, I receive a small amount of compensation from qualifying purchases at no expense to you. This helps support my work and allows me to bring more yummy recipes your way.
This recipe uses basic baking tools, but if you’re stocking up or upgrading your kitchen gear, these items will come in handy:
- Measuring spoons
- Measuring Cups
- Stand Mixer with mixing bowls or hand mixer with a large mixing bowl.
- Cooling Rack
- Plastic Wrap
- Parchment Paper
- Baking Sheet
Ingredients
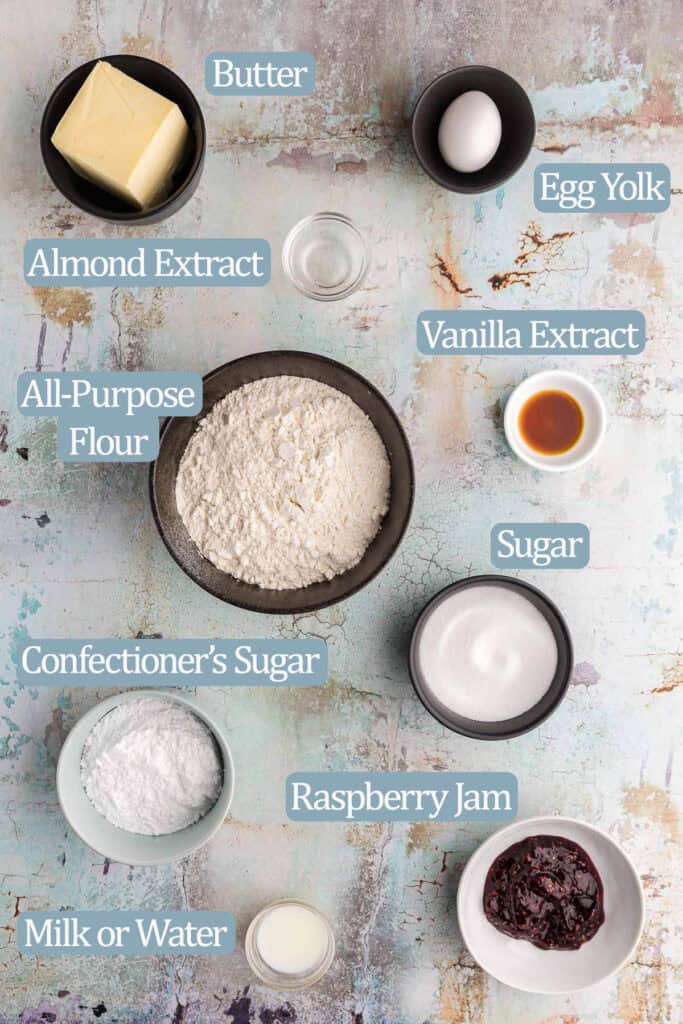
Salted butter – adds rich flavor and keeps the cookies moist.
Granulated sugar – adds sweetness.
Egg yolk – helps to make the dough richer and more pliable.
Almond extract – gives a hint of almond flavor. Can replace with vanilla extract if you prefer.
All-purpose flour – adds structure to the cookies, and balances out the richness of the butter and sugar.
Raspberry jam – adds sweetness, a fruity tartness, and a pop of festive red color.
Confectioner’s sugar – the base for the icing sugar.
Vanilla extract – adds vanilla flavor to the icing sugar – can be omitted and replaced with water, or you can use another flavor extract.
Milk or water – Gives the icing its fluid form.
How To Make Raspberry Thumbprint Cookies
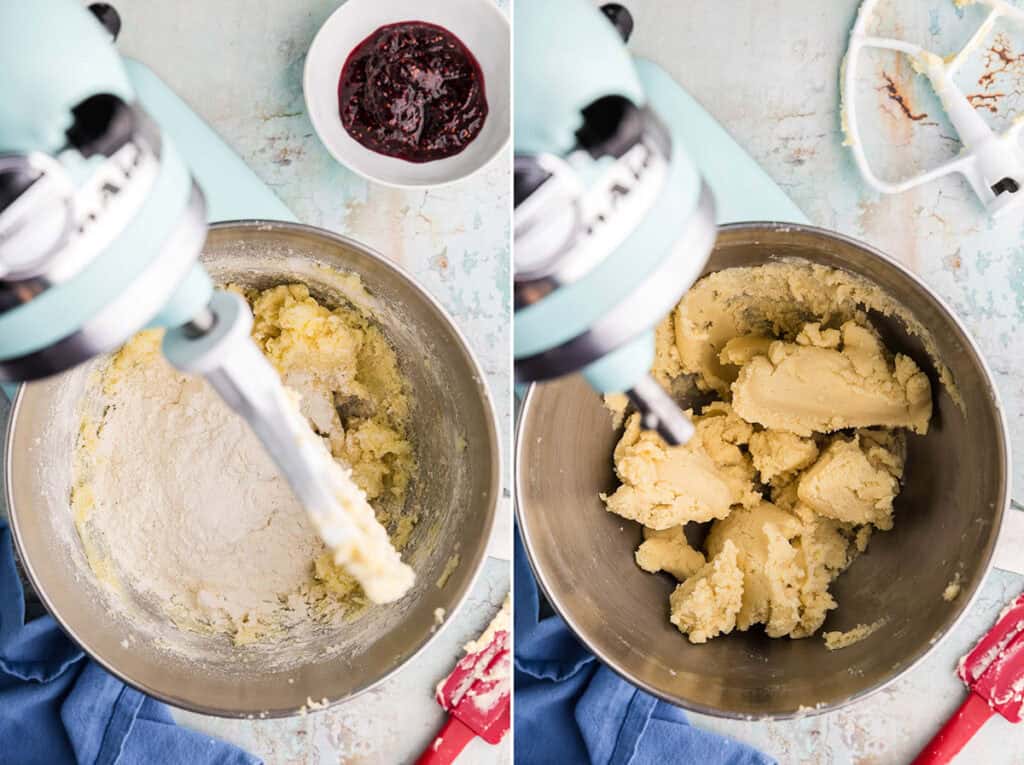
Cream room temperature butter with ½ cup sugar for two minutes, so the mixture becomes light and fluffy. Feel free to occasionally scrape the sides of the bowl with a rubber spatula as needed.

Add in the egg yolk and almond extract, beat to combine for about 30 seconds.
Add in half the flour and beat until combined (about 20 seconds) then add in the last half of the flour and beat until the dough comes together but is still a bit crumbly looking (about another 30 seconds).
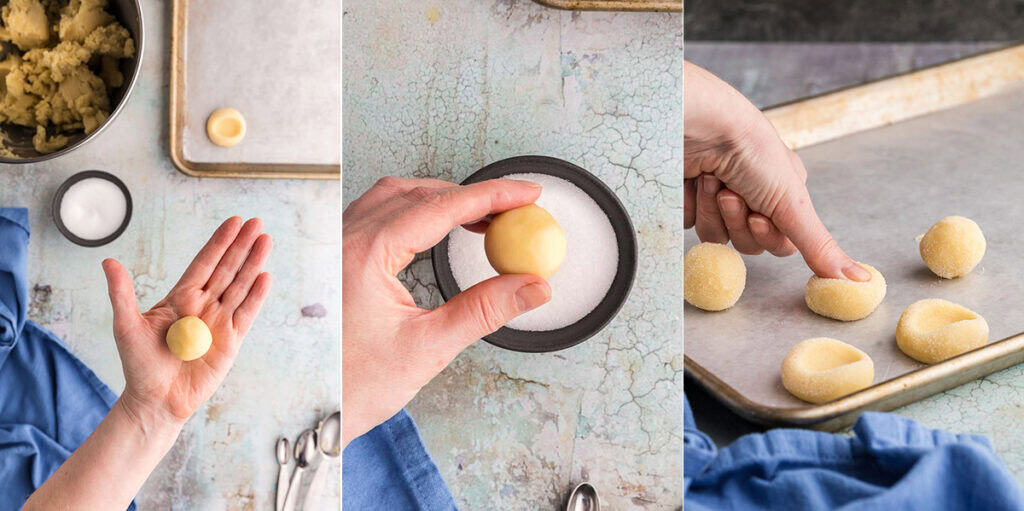
Take about a tablespoon dough (19-20g) and roll it into a ball. Roll the dough ball in a small bowl of granulated sugar. Place the ball on a parchment paper-lined baking sheet and press your thumb in the middle to make a thumbprint divot. The cookies don’t spread much during cooking but make sure there is room for air circulation between the cookies.
Once all the dough balls are prepared, cover with plastic wrap and place the baking sheet into the fridge to chill for 1 hour or into the freezer for 30 minutes.
Preheat oven to 350F
After the cookies have chilled, fill the divots with raspberry jam (or your preferred flavor) and place the baking sheet in the oven for 17-20 minutes.
The cookies will be very lightly browned around the edges. Pull the pan out of the oven and allow the cookies to cool for about 5 minutes and then remove them to a cooling rack to completely cool.
Once cookies have cooled you can serve them or you can glaze them if you like.
Make the glaze
While cookies are cooling make the glaze.
To the bowl of confectioner’s sugar, add all the vanilla extract and 1 tablespoon of milk or water. Stir to combine. Depending on the consistency you want, you may be happy as is, or you can add a little more liquid to make it a bit thinner. I recommend just adding about ¼ teaspoon at a time and mixing in.
Place icing sugar in a piping bag with a small tip or you can place in a small zipper top bag as I did in these pictures. If using a zipper top bag, just cut a very small bit of the corner off to pipe out of.
Pipe icing over the cookies in any pattern you like.
Substitutions
Sometimes we might not have all the ingredients we need. Luckily there are some substitutions you can use and still get great results.
Salted butter can be replaced with unsalted butter and 1/2 teaspoon of salt added with the all-purpose flour.
Almond extract can be replaced with vanilla extract or omitted entirely. I like the hint of the nutty almond flavor, but it might not be for everyone.
The egg yolk is not a traditional ingredient, so it can be omitted too, but it does help to make the dough a little more pliable helping to prevent cracking and it helps the cookie to hold together better and spread a little less.
The raspberry jam and be replaced with any jam you prefer.
If you don’t like vanilla extract you can omit it from the glaze, and just add the same volume of water. You could also replace the vanilla with another extract.
I usually use milk or water when making the icing, but some people like to use lemon juice for a little bit of a tart kick.
Pro Tips and Tricks
- Room temperature butter is important when creaming the butter and sugar together so you get a smooth fluffy creamy mixture. Sometimes I forget to leave butter out on the counter, but there is a quicker trick. Microwave 2 cups of water in a microwavable mug/cup and then quickly put the cup of butter in the microwave (with the water in one corner of the microwave). Close the door quickly, and let it sit for about 30 minutes. Check after 15 minutes to see how it is doing.
- If you want your cookies to be very consistent in size, use a measured scoop like a tablespoon, cookie scoop, or a scale.
- Rolling the balls in your hands is a fun one for the kids to help with.
- Icing/glazing your thumbprint cookies is totally optional, and you can make the consistency on the thicker side like I did in these pictures, or you can add a little more water/milk and make it more like a glaze, totally up to you.
FAQs
How do I keep the jam from bubbling over or spilling out? Don’t overfill the indent, and use a thick jam. Jelly tends to be thinner. I made the mistake of overfilling and some of my cookies have spillage – but still delicious.
How should I store jam thumbprint cookies? Keep them in an airtight container on the counter for up to a week. You can place the container in the fridge to get a few more days of freshness, and they all freeze quite well. Place them in a zipper top bag for up to three months in the freezer.
Can I make the dough ahead of time? Yes! You can make the dough and wrap it in plastic wrap to keep in the fridge for about a week. Or you can place in an airtight zipper top bag and place in the freezer for up to three months. Just allow the dough to thaw in the fridge overnight then continue on with the recipe.
Can I make these “gluten-free thumbprint cookies”? I don’t see why not if you have a good gluten-free flour. I find Cup 4 Cup Gluten Free flour to be a good substitute for all-purpose flour in other baked goods, so that is what I would try. But having said that, I haven’t tried it with these cookies. If you do, please let me know how it goes!
Raspberry Thumbprint Cookies
Ingredients
For the Dough
- 1 cup salted butter room temperature (230g)
- 1/2 cup granulated sugar (105g) + more for rolling dough balls in
- 1 large egg yolk
- 3/4 teaspoon almond extract
- 2 ⅓ cup all-purpose flour spooned & leveled (293g)
- 1/3 cup raspberry jam (or your favorite flavor) (100g)
For the Glaze
- 1 cup confectioner's sugar (109g)
- ½ tsp vanilla extract
- 1 tbsp + ½ tsp milk or water
Instructions
- Cream room temperature butter with ½ cup sugar for two minutes, so the mixture becomes light and fluffy. Feel free to occasionally scrape the sides of the bowl with a rubber spatula as needed.
- Add in the egg yolk and almond extract, beat to combine for about 30 seconds.
- Add in half the flour and beat until combined (about 20 seconds) then add in the last half of the flour and beat until the dough comes together but is still a bit crumbly looking (about another 30 seconds).
- Take about a tablespoon dough (19-20g) and roll it into a ball. Roll the dough ball in a small bowl of granulated sugar. Place the ball on a parchment paper-lined baking sheet and press your thumb in the middle to make a thumbprint divot. The cookies don’t spread much during cooking but make sure there is room for air circulation between the cookies.
- Once all the dough balls are prepared, cover with plastic wrap and place the baking sheet into the fridge to chill for 1 hour or into the freezer for 30 minutes.
- Preheat oven to 350F
- After the cookies have chilled, fill the divots with raspberry jam (or your preferred flavor) and place the baking sheet in the oven for 17-20 minutes. The cookies will be very lightly browned around the edges. Pull the pan out of the oven and allow the cookies to cool for about 5 minutes and then remove them to a cooling rack to completely cool.
- Once cookies have cooled you can serve them or you can glaze them if you like.
- Make the glaze
- While cookies are cooling make the glaze.
- To the bowl of confectioner’s sugar, add all the vanilla extract and 1 tablespoon of milk or water. Stir to combine. Depending on the consistency you want, you may be happy as is, or you can add a little more liquid to make it a bit thinner. I recommend just adding about ¼ teaspoon at a time and mixing in.
- Place icing sugar in a piping bag with a small tip or you can place in a small zipper top bag as I did in these pictures. If using a zipper top bag, just cut a very small bit of the corner off to pipe out of.
- Pipe icing over the cookies in any pattern you like.
Notes
- Room temperature butter is important when creaming the butter and sugar together so you get a smooth fluffy creamy mixture. Sometimes I forget to leave butter out on the counter, but there is a quicker trick. Microwave 2 cups of water in a microwavable mug/cup and then quickly put the cup of butter in the microwave (with the water in one corner of the microwave). Close the door quickly, and let it sit for about 30 minutes. Check after 15 minutes to see how it is doing.
- If you want your cookies to be very consistent in size, use a measured scoop like a tablespoon, cookie scoop, or a scale.
- Rolling the balls in your hands is a fun one for the kids to help with.
- Icing/glazing your thumbprint cookies is totally optional, and you can make the consistency on the thicker side like I did in these pictures, or you can add a little more water/milk and make it more like a glaze, totally up to you.
Follow Me On Social Media
If You Liked This Raspberry Thumbprint Cookies Recipe…
If you liked this recipe, please consider rating the recipe and leaving a comment below – I love to hear how people get on with my recipes and I truly make an effort to respond to everyone who takes the time to comment. Other recipes you might enjoy include:
Decided to test these out for my holiday cookie lineup and am so happy I did. Love the buttery cookies with the tart raspberry jam!
Hi Courtney. I’m glad to hear you enjoyed the cookies. They will be great in a holiday cookie lineup I’m sure! Good luck.
I love making thumbprint cookies and this raspberry version is delish! Thanks for the recipe!
You are welcome, glad you enjoyed it.
We made these, and my kids loved them! Love the raspberry filling and glaze. They are fun to make, my kids loved doing the thumbprints. Thanks for the great recipe!
Hi Risa! Glad the kids had fun and enjoyed the cookies, that is really great to hear! Thanks for sharing.
Can’t wait to bake these! Buttery, tender cookies with a sweet raspberry jam center!
They are very yummy, I’m sure you will enjoy them!