
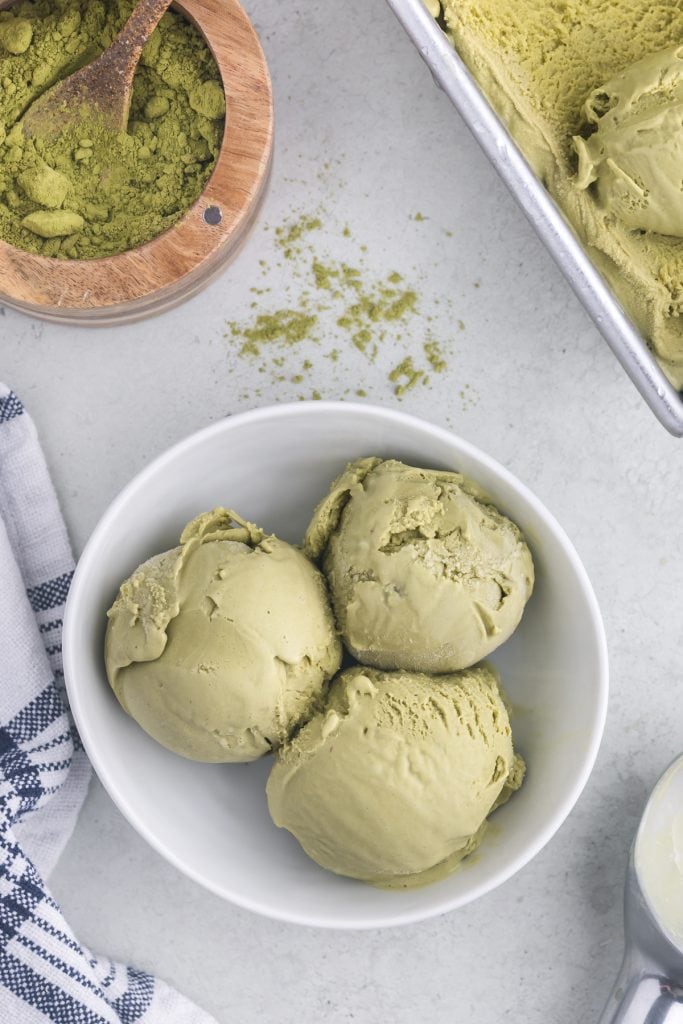
A long time ago, while living in Japan, I fell in love with matcha ice cream. Many might think green tea ice cream would be bland, but its flavor is surprisingly complex. It strikes a perfect balance between the sweet creaminess of ice cream and the deep, earthy richness of matcha, accented by grassy undertones and a subtle bittersweetness – like a matcha latte in frozen form
“Green tea ice cream” almost feels like a misnomer as there is a difference between the drinks “green tea” and “matcha”. So what is the difference you may ask? Green tea is the drink we might be more familiar with in the West. It is made by steeping green tea leaves in hot water to produce a lightly flavoured tea. Matcha on the other hand is made from green tea leaves that have been ground into a powder. When making matcha tea, this powder is whisked into hot water with a bamboo whisk called a chasen to produce a stronger earthy/grassy flavour with more of a bittersweetness.
Matcha also provides more of the green tea health benefits than steeped green tea does for a couple of reasons. First off, matcha production keeps more of the amino acids and antioxidants intact. Secondly, the tea leaves containing all the healthy compounds are totally consumed in matcha, whereas they are discarded when drinking green tea. I’m not sure if this is a plus or a minus as it probably depends on the individual, but there is more caffeine in matcha, around 70mg to green tea’s 35mg (coffee is around 100mg).
The Health Benefits of Matcha
So what are all the health benefits of matcha? Here is a link to an article I recently read by Women’s Health Magazine outlining said benefits. In a nutshell:
- Matcha is loaded with antioxidants and vitamins A, B, C, E, and K. Antioxidants help protect cells from the damaging effects of free radicals. Overexposure to free radicals can lead to premature aging and developing a plethora of diseases including heart disease and certain cancers.
- It may help your skin by stimulating collagen production and promoting healthy skin cell turnover.
- It may promote healthier cholesterol levels by reducing LDL (the bad cholesterol) levels
- It may protect your brain by helping to slow cognitive decline with the presence of vitamin K and lutein
- It may help fight off infection due to the presence of antioxidants.
I love matcha ice cream as it is, but I’m pretty happy with the bonus of all the good things it provides too 🥰. Butterscotch Ripple, what have you done for me lately? 😜
Equipment Needed
Disclosure: as an Amazon affiliate, I receive a small amount of compensation from qualifying purchases at no expense to you. This helps support my work and allows me to bring more yummy recipes your way.
The biggest equipment component to this recipe is an ice cream maker. I have a KitchenAid Mixer and I bought the Ice Cream Bowl attachment. You need to freeze the bowl for at least 16 hours before beginning, but it worked great and I would recommend it if you have a KitchenAid Mixer. If you want a standalone ice cream maker this Cuisinart 1.5 Qt has great reviews. The bowl also needs to be frozen for 16 hours.
- Ice Cream Bowl attachment for KitchenAid Mixer or Cuisinart 1.5 Qt Ice Cream Maker
- Mixing bowl
- Whisk
- Medium Saucepan
- Rubber Spatula
- Fine Mesh Sieve
- Ice Cream Scoop – when it comes to ice cream scoops this is my go to scoop. I highly highly recommend the Zeroll Ice Cream Scoop. I can not say enough good things about it, it is an ice cream game changer. This scoop has a special liquid in the interior that warms up when your hand is grasping the scoop. The warm liquid warms the metal and it slices through the ice cream like butter (ok that’s a slight exaggeration, but not a total exaggeration). It makes scooping ice cream a pleasure. The one downside, is you have to be very meticulous with it. Right after using it, wash with cool water and dish soap, rinse and then dry it. Keep it away from heat and it will last for years! LOVE IT!
Ingredients
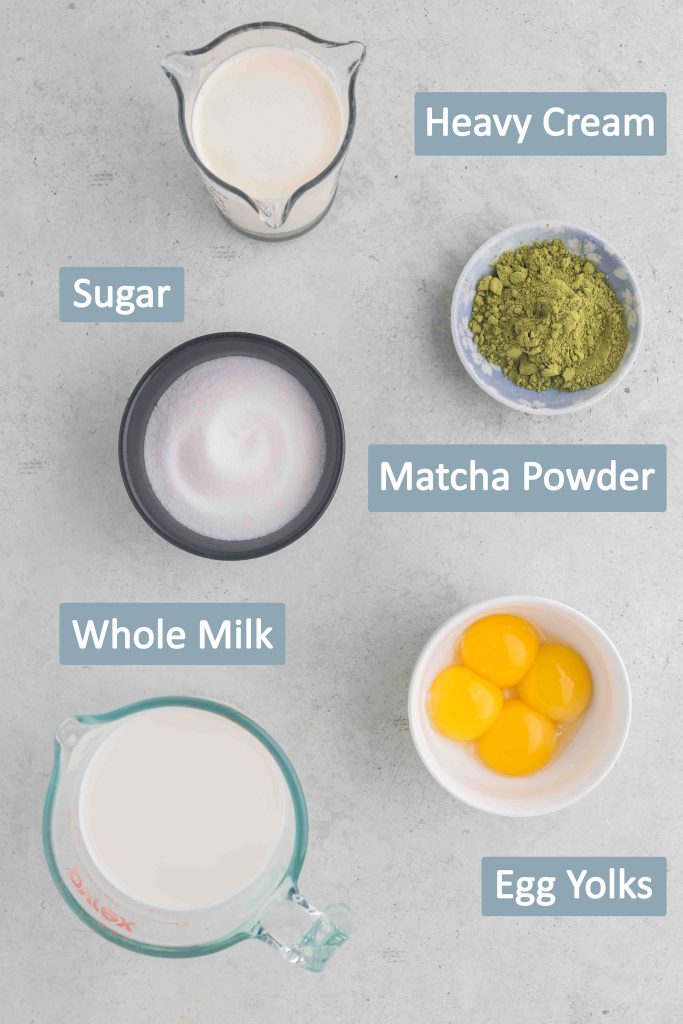
- Egg Yolks
- Granulated Sugar
- Whole Milk
- Heavy Cream (Whipping Cream)
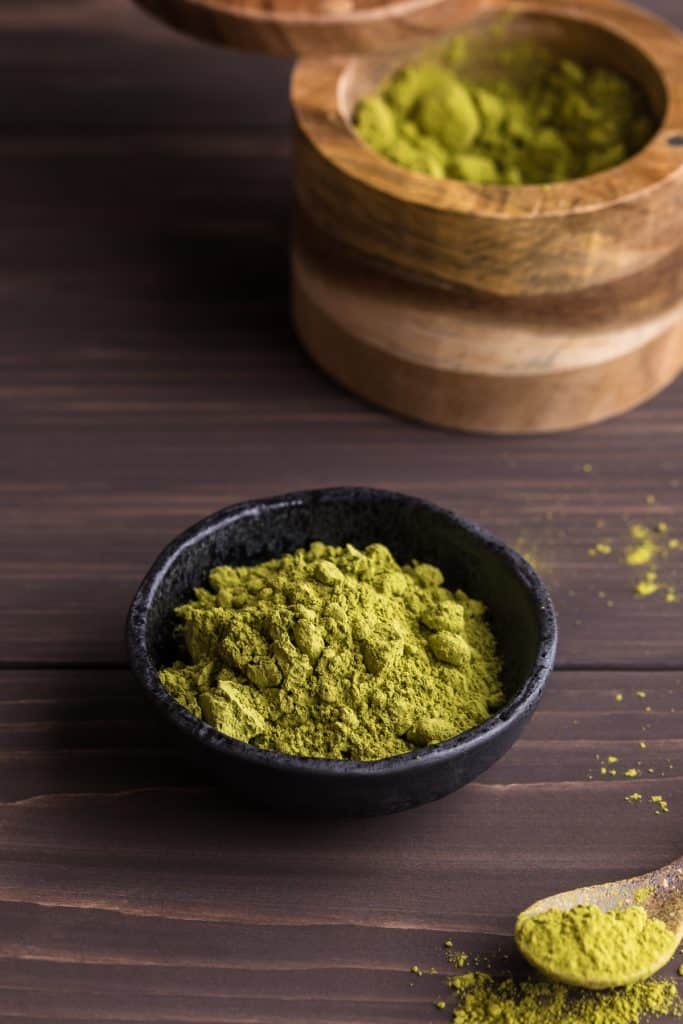
- Matcha Powder
How to Make Matcha Ice Cream
Most ice cream makers need to have the bowl cooled in the freezer for at least 16 hours before making ice cream, so make sure you take this into account before starting.
Making the Matcha Custard
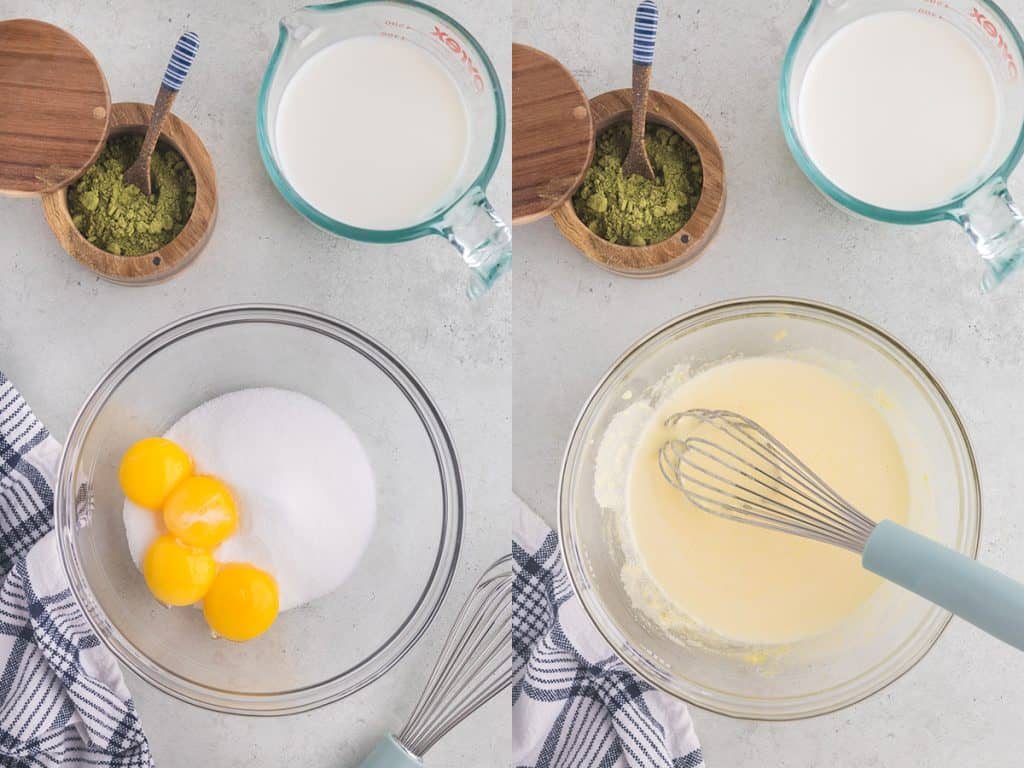
- In a medium sized mixing bowl, combine the egg yolks and sugar. Using a whisk or hand blender cream together the yolks and sugar until you have a pale yellow thick liquid.
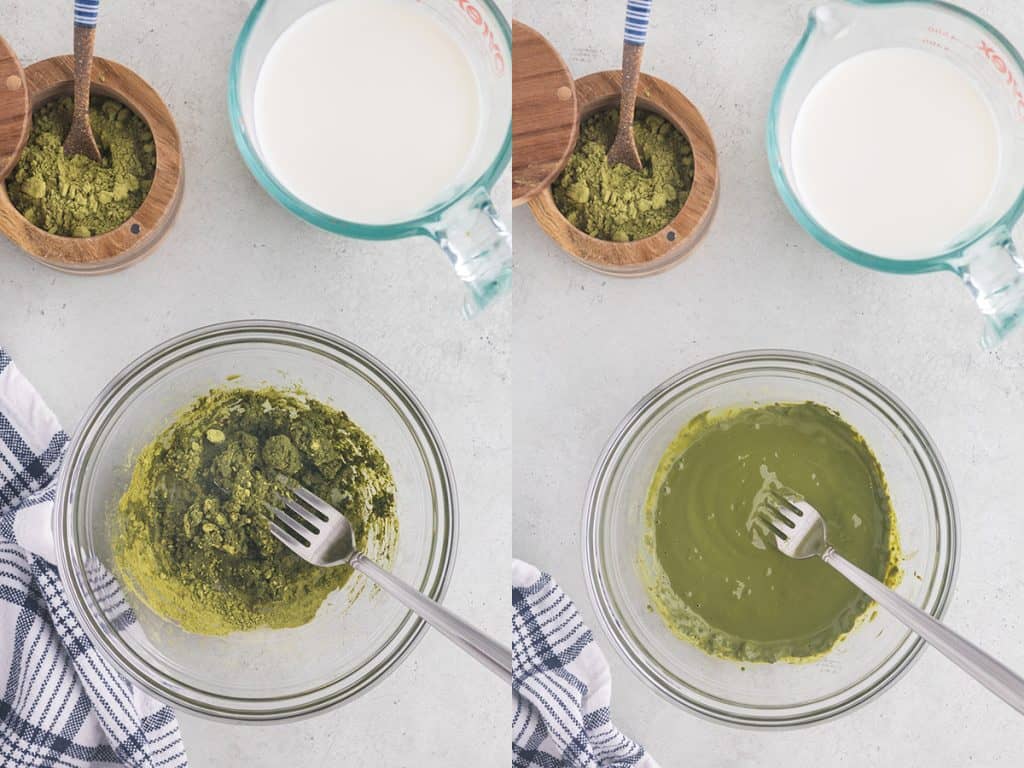
- In another small mixing bowl we will make the matcha paste. Matcha will clump if you just add it directly to a large volume of liquid. So begin with your matcha powder in the mixing bowl and add a small amount of the whole milk to it, about 2 tablespoons. Use a fork to begin combining the milk and matcha powder and keep adding a tablespoon or two of milk at a time with mixing in between until you get a creamy paste with few to no clumps.
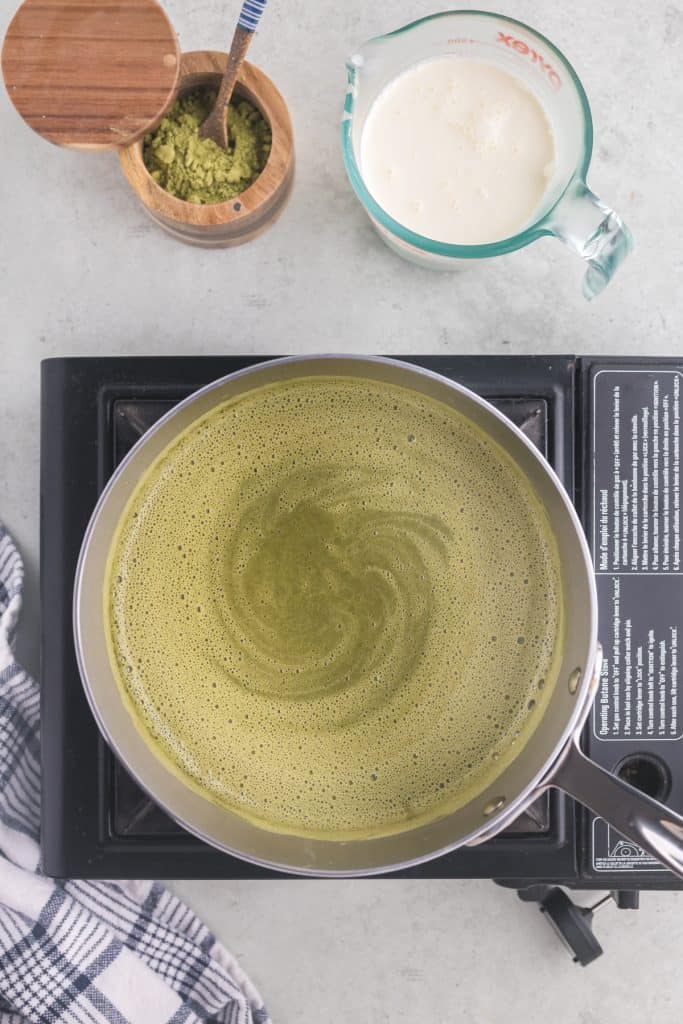
- Transfer the matcha paste to a medium sized saucepan. Add the remaining whole milk (but don’t add the heavy cream – keep it in the fridge) and use a whisk to completely combine the matcha paste and the milk. Place on the stovetop and begin heating on medium heat until the matcha milk is hot but not boiling around 170F (you might see steam being released).
- Remove roughly a half cup of the hot matcha milk and set the saucepan aside.
- Return to the mixing bowl with the egg yolk and sugar mixture. Begin adding the 1/2 cup of hot matcha milk slowly with constant stirring (can use a whisk or a spoon). This will temper the eggs (brings the temperature of the eggs up without cooking them).
- Slowly add the tempered egg/matcha/milk mixture to the rest of the hot matcha milk in the saucepan while stirring constantly. Once fully combined, turn the heat up to medium and begin heating with constant stirring until the temperature reaches about 170F, try to stay under 175F. Going above 175F can bring about unnecessary bitterness in the matcha. You may notice the mixture begins to thicken, but you don’t want it to boil. This is now your custard base.
- Remove the saucepan from the heat and pour it through a fine mesh sieve into a clean mixing bowl. You may need to use a rubber spatula to help push the custard through the sieve. This step helps to remove any unwanted clumps most likely due to a small amount of egg whites which are present with the egg yolks. If you don’t have a fine mesh sieve, you can skip this step, you might just have a few lumps in your final ice cream.
- Add your cold heavy cream to the strained matcha custard and stir to completely combine. Cover the matcha custard with a lid or saran wrap and place in the fridge to cool for at least 4 hours or overnight. It is important to let the custard cool completely. Adding warm or slightly warm ice cream batter to your ice cream maker may leave you with a “liquidy” final product if the cold temperature from your ice cream maker isn’t enough to overcome the temperature of your custard.
Making Ice Cream from the Matcha Custard Batter
- Once your ice cream batter has cooled to fridge temperature you can follow the instructions of your ice cream manufacturer. For my KitchenAid mixer I need to make sure the mixer is turning before I add in the ice cream batter or it may freeze solid and break the mixer when you turn it on.
- Let the ice cream churn in the ice cream maker for 22 minutes.
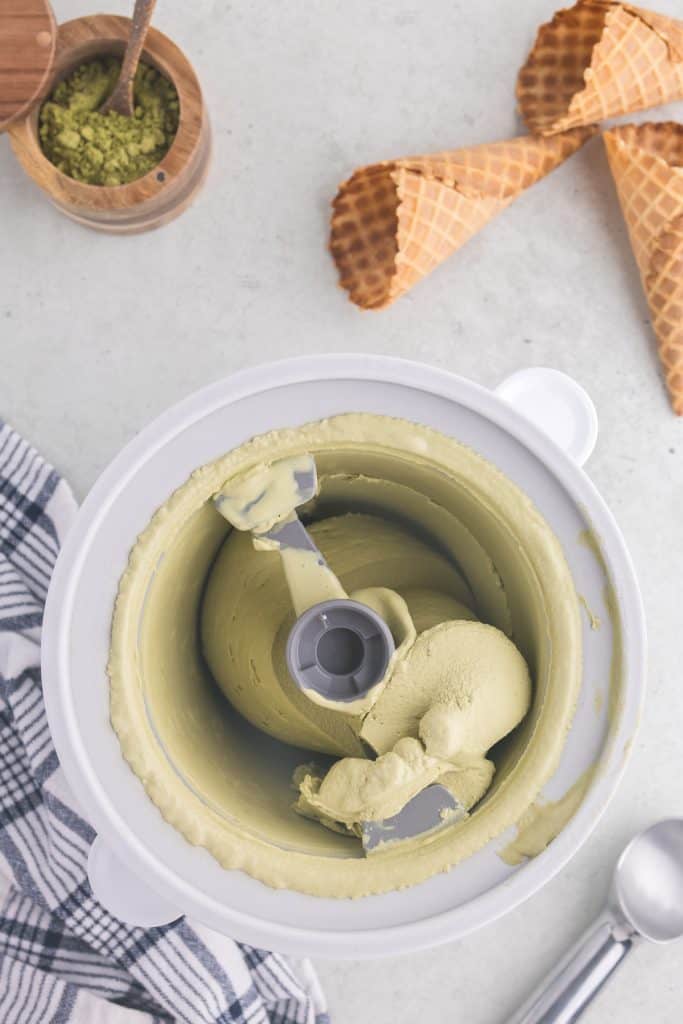
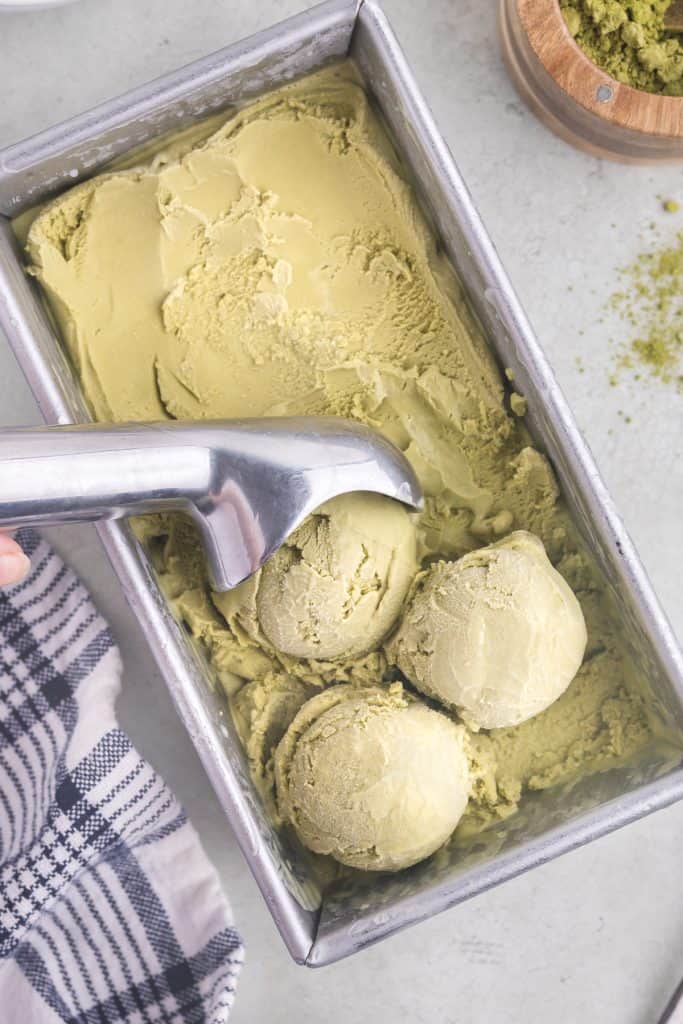
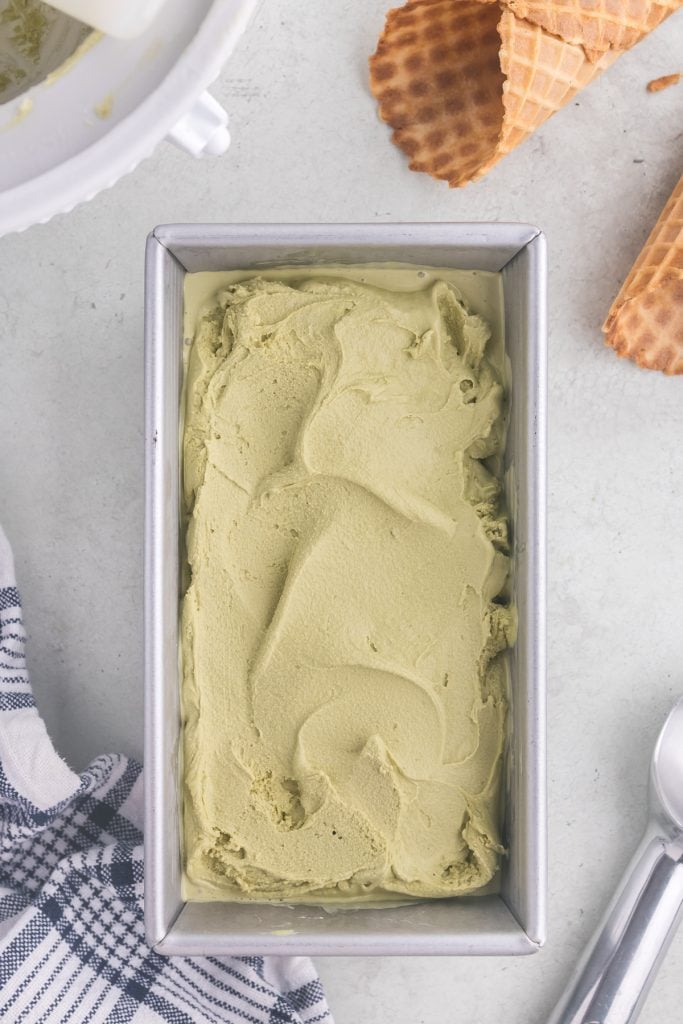
- Scoop out the ice cream (it will have the consistency of soft serve at this point) and place in a container that is freezer safe. Smooth out the surface with gentle pressing in order to remove any air pockets then cover and place in the freezer for at least 7 hours to get a firmer consistency suitable for scooping.
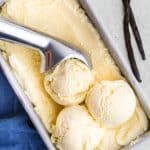
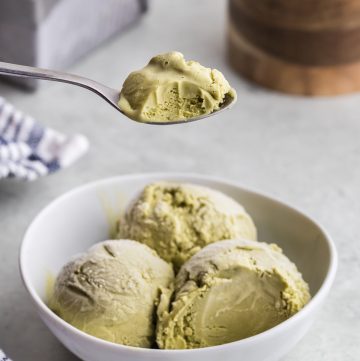
- Once fully chilled, you can scoop and serve in a cone or a bowl. Enjoy the complex flavour and the health benefits of this delicious ice cream!
Notes
- Make sure to put the ice cream maker bowl in the freezer at least 16 hours before you will need it. Nothing worse than getting to the ice cream making step and not having your bowl ready.
- I leave the heavy cream in the fridge and add it to the warm custard base to help cool the custard down faster. Many recipes add the heavy cream when the whole milk is added and heat on the stovetop…
- Matcha powder is such a fine powder that it has electrostatic forces that cause it to clump when you are trying to mix it into water. Also, matcha will never actually dissolve in water, at best you are able to evenly disperse it. This is why it is good to make a paste by slowly adding water and whisking together.
- Matcha is also heat sensitive. Normally when making matcha tea you use water that is below 175F. If you go over this, the matcha can become more bitter than you might hope for. So when heating up the milk and matcha, it is best to not go over 175F for the same reason.
- When shopping for matcha you can find “ceremonial grade” and “culinary grade”. Ceremonial grade is more expensive and normally reserved for drinking on it’s own, and culinary grade is for adding to recipes. I used culinary grade in this recipe with great results.
FAQs
- Why do we have to temper the eggs when making the custard? Adding hot milk to egg yolks can lead to cooked yolks or at least cooked bits, so by adding the hot milk slowly with rapid stirring we are able to heat up the eggs slowly and we don’t end up cooking them into solid chunks.
- Why does the ice cream maker bowl need to be chilled so long? Do I really need to wait 16 hours? It really comes down to this: If your bowl isn’t super super cold, it won’t freeze your batter into ice cream. Yes, you need to wait the 16 hours – do not cut this corner. It would be so sad, to have ice cream that just won’t freeze 🥺
- How long does it last last in the freezer? The more air tight your container, the longer your ice cream will last. There’s no reason you shouldn’t be able to keep it for up to three months, but I think it will taste best if eaten in the first two weeks, to avoid frost build up etc.

If You Liked This Matcha Ice Cream Recipe…
If you liked this recipe, please consider leaving a comment below – I love to hear how people get on with my recipes and I truly make an effort to respond to everyone who takes the time to comment. Other cold treats you might enjoy include:

Matcha Ice Cream
Ingredients
- 2/3 cup granulated sugar
- 4 egg yolks
- 1 1/2 cup whole milk
- 2 1/2 tablespoon matcha powder
- 1 1/2 cup heavy cream
Instructions
- In a medium sized mixing bowl, combine the egg yolks and sugar. Using a whisk or hand blender cream together the yolks and sugar until you have a pale yellow thick liquid.
- In another small mixing bowl make the matcha paste. Matcha will clump if you just add it directly to a large volume of liquid. So begin with your matcha powder in the mixing bowl and add a small amount of the whole milk to it, about 2 tablespoons. Use a fork to begin combining the milk and matcha powder and keep adding a tablespoon or two of milk at a time with mixing in between until you get a creamy paste with few to no clumps.
- Transfer the matcha paste to a medium sized saucepan. Add the remaining whole milk (but don't add the heavy cream – keep it in the fridge) and use a whisk to completely combine the matcha paste and the milk. Place on the stovetop and begin heating on medium heat until the matcha milk is hot but not boiling around 170F (you might see steam being released).
- Remove roughly a half cup of the hot matcha milk and set the saucepan aside.
- Return to the mixing bowl with the egg yolk and sugar mixture. Begin adding the 1/2 cup of hot matcha milk slowly with constant stirring (can use a whisk or a spoon). This will temper the eggs.
- Slowly add the tempered egg/matcha/milk mixture to the rest of the hot matcha milk in the saucepan while stirring constantly. Once fully combined, turn the heat up to medium and begin heating with constant stirring until the temperature reaches about 170F, try to stay under 175F. See Note 4. You may notice the mixture begins to thicken, but you don't want it to boil. This is now your custard base.
- Remove the saucepan from the heat and pour it through a fine mesh sieve into a clean mixing bowl. You may need to use a rubber spatula to help push the custard through the sieve. If you don't have a fine mesh sieve, you can skip this step, you might just have a few lumps in your final ice cream.
- Add your cold heavy cream to the strained matcha custard and stir to completely combine. Cover the matcha custard with a lid or saran wrap and place in the fridge to cool for at least 4 hours or overnight. It is important to let the custard cool completely. Adding warm or slightly warm ice cream batter to your ice cream maker may leave you with a "liquidy" final product if the cold temperature from your ice cream maker isn't enough to overcome the temperature of your custard.
- Once your ice cream batter has cooled to fridge temperature you can follow the instructions of your ice cream manufacturer. For my KitchenAid mixer I need to make sure the mixer is turning before I add in the ice cream batter or it may freeze solid and break the mixer when you turn it on.
- Let the ice cream churn in the ice cream maker for 22 minutes. Scoop out the ice cream (it will have the consistency of soft serve at this point) and place in a container that is freezer safe. Smooth out the surface with gentle pressing in order to remove any air pockets then cover and place in the freezer for at least 7 hours to get a firmer consistency suitable for scooping.
- Once fully chilled, you can scoop and serve in a cone or a bowl.
Notes
- Make sure to put the ice cream maker bowl in the freezer at least 16 hours before you will need it. Nothing worse than getting to the ice cream making step and not having your bowl ready.
- I leave the heavy cream in the fridge and add it to the warm custard base to help cool the custard down faster. Many recipes add the heavy cream when the whole milk is added and heat on the stovetop…
- Matcha powder is such a fine powder that it has electrostatic forces that cause it to clump when you are trying to mix it into water. Also, matcha will never actually dissolve in water, at best you are able to evenly disperse it. This is why it is good to make a paste by slowly adding water and whisking together.
- Matcha is also heat sensitive. Normally when making matcha tea you use water that is below 175F. If you go over this, the matcha can become more bitter than you might hope for. So when heating up the milk and matcha, it is best to not go over 175F for the same reason.
- When shopping for matcha you can find “ceremonial grade” and “culinary grade”. Ceremonial grade is more expensive and normally reserved for drinking on it’s own, and culinary grade is for adding to recipes. I used culinary grade in this recipe with great results.
Love this recipe!
Thanks for commenting and leaving a rating. Matcha ice cream is delicious!
I ended up with a surplus of matcha and this was the perfect way to use some of it! Love how creamy this was and the matcha flavor was just right.
I really enjoy matcha ice cream, glad you liked it too!