
There’s a reason traditional deviled eggs have never gone out of style. Creamy, tangy, and perfectly seasoned, they’re the kind of appetizer that quietly disappears from the platter faster than anything else. Whether you’re hosting a holiday gathering, bringing a dish to a potluck, or just craving a little nostalgia, this classic recipe delivers that familiar, comforting flavor everyone expects… and always comes back for seconds.

These deviled eggs are the perfect appetizer for any occasion. They fit right in at potlucks, game day spreads, and especially brunch. Easy to pick up and enjoy in just a few bites, they’re a no-fuss, crowd-pleasing favorite every time. If you’re looking for a more elevated twist, be sure to try my Smoked Salmon Deviled Eggs.
If you’re planning a full brunch menu, these pair beautifully with an Eggs Benedict Casserole, Brioche French Toast Casserole, and/or Quiche. For drinks, you can’t go wrong with classics like a Bloody Mary, Paloma, Limoncello Spritz, or Mimosas. And if you’re keeping things alcohol-free, Non-Alcoholic Mimosas and a Paloma Mocktail are just as festive and refreshing.
Why You Will Love These Deviled Eggs
- Classic, nostalgic flavor – That creamy, tangy filling is exactly what everyone expects (and loves).
- Simple pantry ingredients – No fancy extras, just staples you likely already have on hand.
- Perfect for any gathering – From holiday tables to potlucks and BBQs, they always fit right in.
- Make-ahead friendly – Prep them in advance and keep them chilled until you’re ready to serve.
- Crowd-pleasing and kid-friendly – A guaranteed hit with both adults and little ones.
- Easy to customize – Add pickles, onions, or herbs to make them your own.
- Naturally gluten-free – A great option for guests with dietary restrictions.
Equipment Needed to Make Deviled Eggs
Disclosure: as an Amazon affiliate, I receive a small amount of compensation from qualifying purchases at no expense to you. This helps support my work and allows me to bring more yummy recipes your way.
- Measuring Spoons
- Measuring Cups
- Hand mixer with a medium sized mixing bowl.
- Citrus Squeezer
- Piping Bag and Tips or zipper top bags (like a Ziploc)
- Slotted Spoon or Spider Skimmer
Ingredients
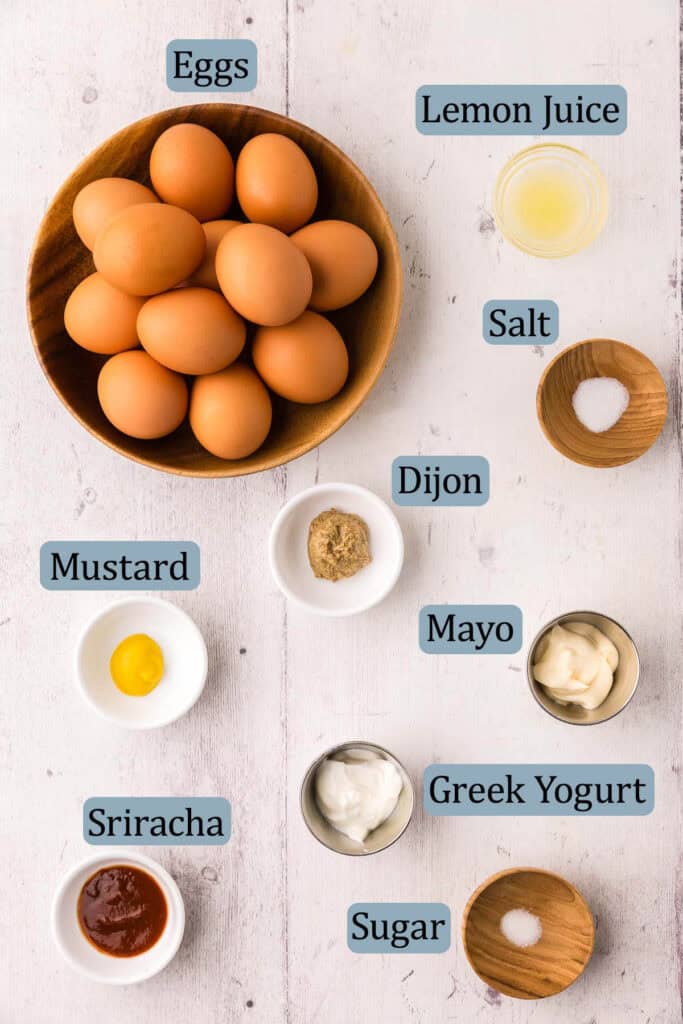
Eggs – the star of the show. The yolks form the base for the filling, and the whites become the serving vessel. Eggs that are 5-10 days old peel more easily than fresh eggs.
Mayonnaise – helps to bring moisture and creaminess to the devilled egg filling.
Greek Yogurt – brings creaminess, moisture, and a little tang to the devilled egg filling.
Dijon and Yellow Mustard – adds acidity and sharpness to cut through the richness of the filling.
Lemon Juice – adds a touch of acidity to keep things light and bright.
Sriracha – a light amount of heat, these are not spicy but it brings a little intrigue. Can be omitted if you like or replaced with your favorite hot sauce.
Salt – helps to round out all the flavors.
Sugar – helps to round out the flavors as well but can be omitted if you prefer.
Garnishes Optional
- Paprika
- Chives
- Pickles
- Onions
How To Make Deviled Eggs
Making Hard Boiled Eggs
If you’ve ever struggled with shells sticking or tearing the whites, this method makes peeling eggs for deviled eggs almost effortless.
Start with slightly older eggs – Eggs that are 5–10 days old peel much more easily than very fresh eggs.
Bring a large pot of water to a boil first. Gently lower the eggs into already boiling water instead of starting them in cold water.
Simmer, don’t overboil. Reduce to a gentle simmer and cook for 10–12 minutes for fully set yolks.
During the cooking process I follow the advice of others and give the eggs a strong stir with a wooden spoon to get the eggs moving in a circular fashion (but gently enough so they don’t crack). Supposedly, the centrifugal force helps to keep the yolk in the middle of the egg so you don’t end up with a thin edge of white on one side. I constantly try to keep them moving in a circle for the first 5 minutes of cooking. It seems to work!
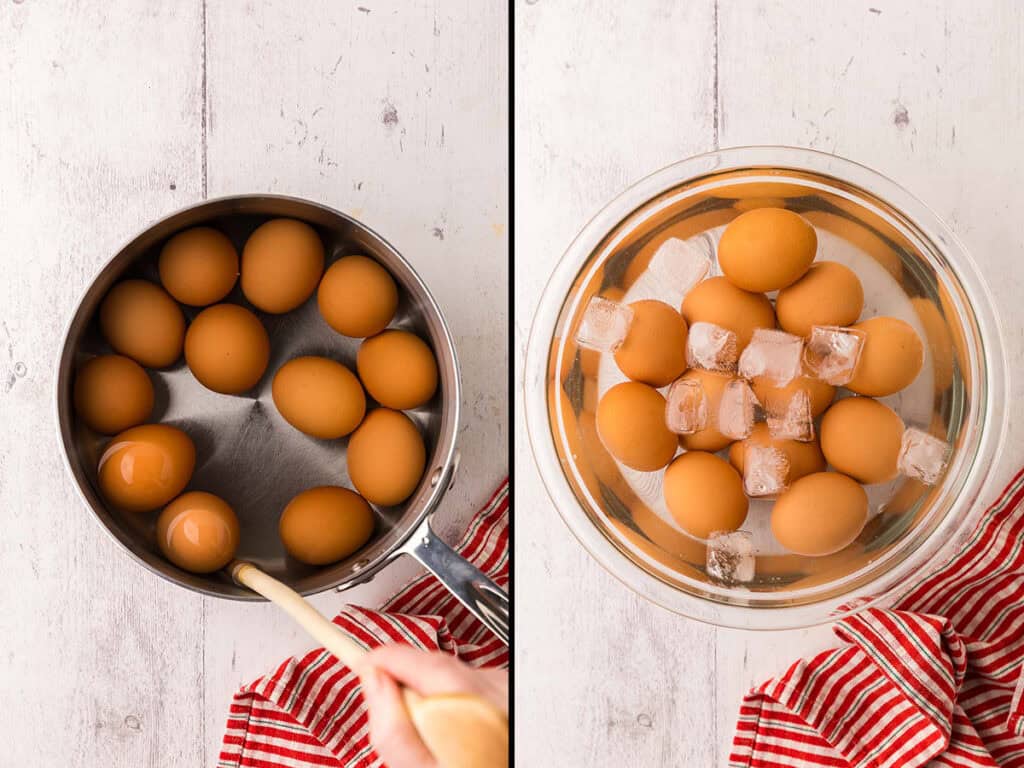
Use an ice bath immediately. Transfer eggs straight into a bowl of ice water after 10 minutes of cooking. This stops cooking and helps separate the shell from the egg.
Lightly tap and roll the egg, then peel starting from the wider end (where the air pocket is).
Tip: The ice bath + slightly older eggs combo is the real secret to smooth, clean deviled eggs.
Preparing the Deviled Egg Filling
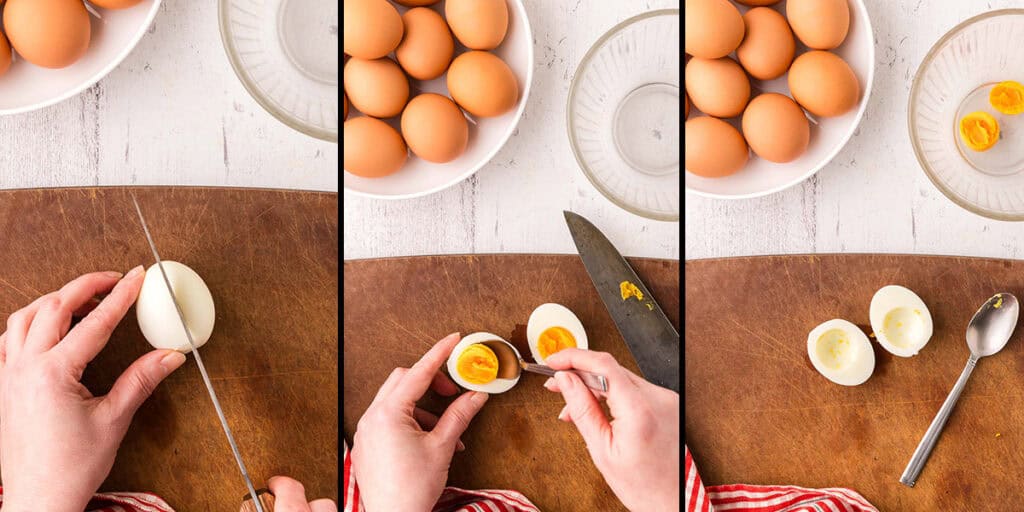
Place the peeled egg on its side and slice it in half lengthwise, cutting from the top (narrow end) to the bottom (wide end) to create two equal halves. Take care to make a clean even cut so you end up with the best appearance possible.
Scoop the yolk out with a spoon and place in a bowl. Set the egg white halves aside.
To the bowl of yolks add the mayonnaise, Greek yogurt, mustards, lemon juice, sriracha, salt and sugar (if using). Cream everything together with a hand mixer – see Pro Tips and Tricks.
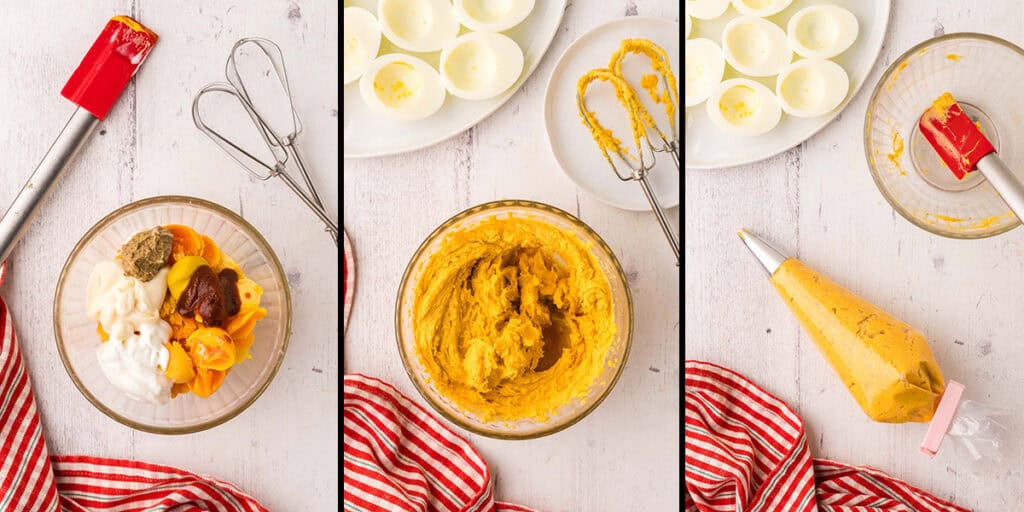
Add the deviled egg filling to a piping bag fitted with the large star tip. See Pro Tips and Tricks.
Pipe the deviled egg filling into the hole left by the yolk. Do this for every every egg half.
It’s optional, but you can sprinkle the eggs with garnishes to add a little pop of color and flavor. I used paprika and chopped chives, but you could also add finely diced onion, bacon, pickles etc. Eggs can be served immediately or placed in the fridge covered with plastic wrap to be stored until ready to serve.

Pro Tips and Tricks:
- Using eggs that have been bought from the store and have sat in the fridge for 7-10 days tend to be easier to peel than fresher eggs. The hardest eggs to peel seem to be eggs straight from the farm.
- For a brighter orange filling choose eggs with orange yolks, like omega-3 eggs, free range, or pasture raised.
- Ice water stops the eggs from continuing to cook – which helps to prevent overcooked eggs. Overcooked eggs can develop the dreaded grey ring around the yolk, and the yolk becomes chalky instead of creamy.
- If you don’t have a hand mixer you can use a fork to mix the yolks with all the ingredients. Just try to make it as smooth as possible. Running it through a strainer will help smooth it out too if you are using a fork.
- If you don’t have a piping bag with a star tip you can use a ziploc bag and snip off a corner to pipe the devilled egg filling into the whites. And if all else fails, you can use a spoon to scoop it in.
FAQs
How far in advance can you make deviled eggs?
Deviled eggs can be made up to 1 day in advance. For best results, store the egg whites and filling separately in the refrigerator and assemble just before serving to keep them fresh and prevent the filling from drying out.
Why are my deviled eggs hard to peel?
Deviled eggs are hard to peel when using very fresh eggs. Slightly older eggs (about 5–10 days old) peel more easily. Placing cooked eggs in an ice bath also helps loosen the shell from the egg white.
What is the best way to get smooth deviled egg filling?
For smooth deviled egg filling, blend the ingredients with a hand mixer or food processor. If using a fork, press yolks through a fine mesh sieve before mixing with other ingredients.
How long can deviled eggs sit out?
Deviled eggs should not sit out at room temperature for more than 2 hours. Because they contain eggs and mayonnaise, they should be kept chilled or served over ice to maintain food safety.
Follow Me On Social Media
If You Liked This Devilled Egg Recipe…
If you liked this recipe, please consider rating the recipe and leaving a comment below – I love to hear how people get on with my recipes and I truly make an effort to respond to everyone who takes the time to comment. For other great brunch recipes check out my Eggs Benedict Casserole, Brioche French Toast Casserole, and Quiche.

Deviled Eggs
Equipment
- Measuring Spoons
- Measuring Cups
- Hand mixer with a medium sized mixing bowl
- Citrus Squeezer
- Piping Bag and Tips or zipper top bags (like a Ziploc)
- Slotted Spoon or Spider Skimmer
Ingredients
- 12 Large Eggs (7-10 days old) cold in the fridge
- 2 tbsp Mayonnaise
- 2 tbsp Greek Yogurt
- 2 tsp Fresh Lemon Juice
- 2 tsp Dijon Mustard
- 1 tsp Yellow Mustard
- ¼ tsp Salt
- ⅛ tsp Sugar optional
Garnish Ideas (optional)
- Paprika
- Fresh chives fine chop
- Onion fine chop
- Cooked Bacon small bits
Instructions
Making Hard Boiled Eggs
- Bring a large pot of water to a boil. Gently lower the eggs into already boiling water.
- Reduce to a gentle simmer and cook for 10–11 minutes for fully set yolks.
- During the boiling process give the eggs a strong stir with a wooden spoon to get the eggs moving in a circular fashion (but gently enough so they don't crack). This helps to keep the yolk in the middle of the egg while it cooks. I try to keep them relatively moving in a circle for the first 5 minutes of cooking and then off an on after that.
- Use an ice bath immediately. Transfer eggs straight into a bowl of ice water after 10 minutes of cooking. This stops the cooking process and helps separate the shell from the egg. Allow to cool for about 5 minutes.
- Lightly tap and roll the egg, then peel starting from the wider end (where the air pocket is).
- Tip: The ice bath + slightly older eggs combo is the real secret to smooth, clean deviled eggs.
Preparing the Deviled Egg Filling
- Place the peeled egg on its side and slice it in half lengthwise, cutting from the top (narrow end) to the bottom (wide end) to create two equal halves.
- Scoop the yolk out with a spoon and place in a bowl. Set the egg white halves aside.
- To the bowl of yolks add the mayonnaise, Greek yogurt, mustards, lemon juice, sriracha, salt and sugar (if using). Cream everything together with a hand mixer – see notes.
- Add the deviled egg filling to a piping bag fitted with the large star tip. See notes.
- Pipe the deviled egg filling into the hole left by the yolk. Do this for every every egg half.
- It’s optional, but you can sprinkle the eggs with garnishes to add a little pop of color and flavor. I used paprika and chopped chives, but you could also add finely diced onion, bacon, pickles etc. Eggs can be served immediately or placed in the fridge covered with plastic wrap to be stored until ready to serve.
Notes
- Using eggs that have been bought from the store and have sat in the fridge for 7-10 days tend to be easier to peel than fresher eggs. The hardest eggs to peel seem to be eggs straight from the farm.
- For a brighter orange filling choose eggs with orange yolks, like omega-3 eggs, free range, or pasture raised.
- Ice water stops the eggs from continuing to cook – which helps to prevent overcooked eggs. Overcooked eggs can develop the dreaded grey ring around the yolk, and the yolk becomes chalky instead of creamy.
- If you don’t have a hand mixer you can use a fork to mix the yolks with all the ingredients. Just try to make it as smooth as possible. Running it through a strainer will help smooth it out too if you are using a fork.
- If you don’t have a piping bag with a star tip you can use a ziploc bag and snip off a corner to pipe the devilled egg filling into the whites. And if all else fails, you can use a spoon to scoop it in.
Loved the addition of Greek Yogurt. I have never added that before!