
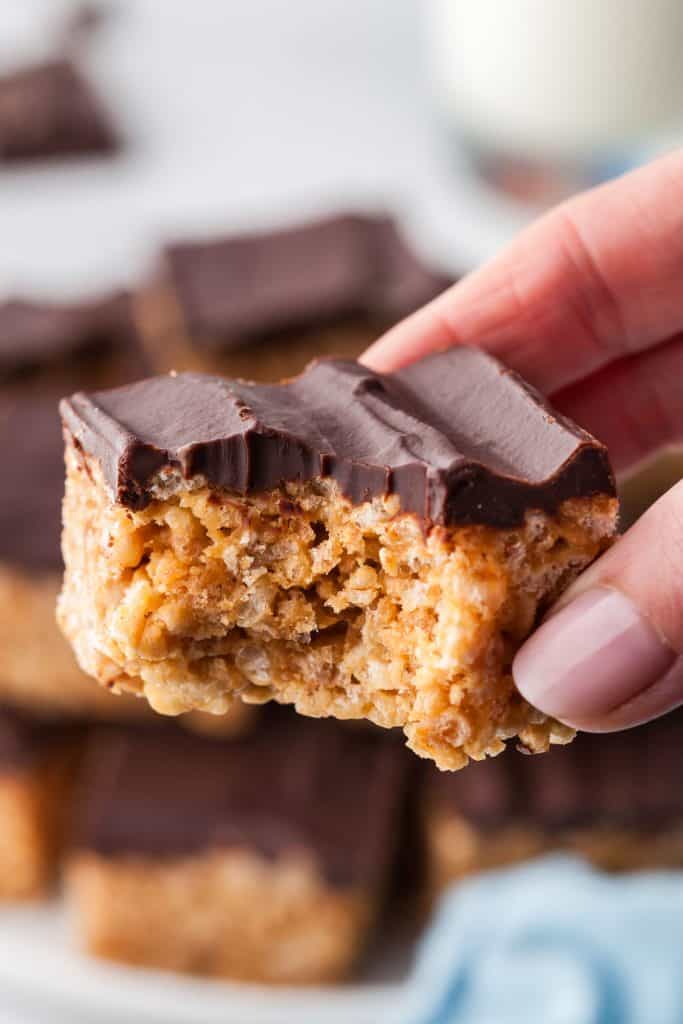
Peanut butter and chocolate are a match made in heaven. These peanut butter rice krispie squares take that divine combination and add a satisfyingly crispy crunch that kids and adults alike will enjoy.
I think most people in North America grew up eating Rice Krispie Treats. It was a staple dessert at kids’ parties, picnics, school lunches, and bake sales to name a few. But I am going to be upfront and honest and just say it, I don’t really like them. My problem, is that I just find them to be too sweet. Don’t get me wrong, I have a sweet tooth. A sweet tooth in the sense that I love dessert and sweet treats, but not too sweet.
Traditionally, rice krispie squares are made with marshmallows, lots and lots of marshmallows. How can they not be over the top sweet? If marshmallows are the culprit in ruining these squares for me, how can I make them without marshmallows? Well my friends, follow along and find out, we are going to make peanut butter rice krispie squares!
Why You Are Going to Love These Chocolate Peanut Butter Rice Crispy Treats
Although the sweetness factor is working against traditional Rice Krispie Squares, they do have a lot of great qualities like: easy to make, no oven required, can be stored on the counter or fridge or freezer, can be made ahead of time, and sell well at bake sales. These chocolate and peanut butter rice krispie treats keep all these great qualities and taste even better because, well, they add chocolate and peanut butter!
Now in order to revoke the use of marshmallows we are going to need to replace this “sticky glue” with something else. I find that real maple syrup and corn syrup are great substitutes. So not only does the removal of marshmallows tone down the sweetness a bit, but it also allows these bars to become vegan if you need them to be (just be careful what kind of chocolate you use and don’t add heavy cream).
You have probably heard the saying “every rose has its thorn”. The thorn for these treats is of course the peanut butter for people with a peanut allergy. I haven’t experimented with using seed butter to make these, but I see no reason why you couldn’t try it. If you do, let me know how it goes in the comments below. You could also try other nut butters like almond and cashew.
Required Ingredients
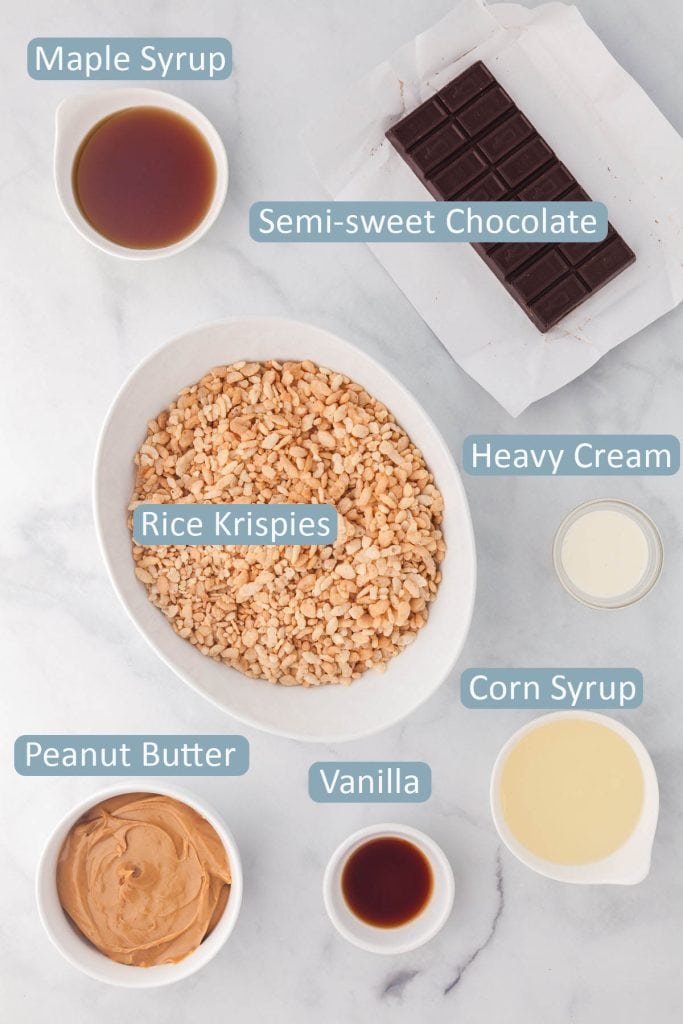
The list of ingredients is pretty short:
- smooth peanut butter – I find the processed kind like Kraft or Jiffy works best, you don’t want the type with oil on the top. If you can find one without sugar added, even better. You can also use crunchy if you want some peanut crunch.
- pure maple syrup – adds sweetness, but you can control how much. Make sure you use pure maple syrup and not an artificial syrup
- corn syrup – adds sweetness and stickiness to help hold the squares together. Now don’t poo poo corn syrup. People often mix up this ingredient with high-fructose corn syrup, which does have a bad rap, but they are not the same. If you want to read a little bit more about the two, check out this article from the Washington Post “What is corn syrup, and how should you use it? Your questions answered”.
- Vanilla extract – adds a little “je ne sais quoi”.
- Rice Krispies – The quintessential ingredient – provides the vessel to carry all the added flavours. You can use any brand of crispy rice you like.
- Chocolate (semi-sweet or whatever version of dark you like)- because anything coated with chocolate is just so much better.
- Heavy Cream – to soften the chocolate into a bit of a ganache – skip if you don’t have any, or prefer a harder chocolate top, or want the recipe to be vegan.
How to Make Peanut Butter Rice Krispie Squares
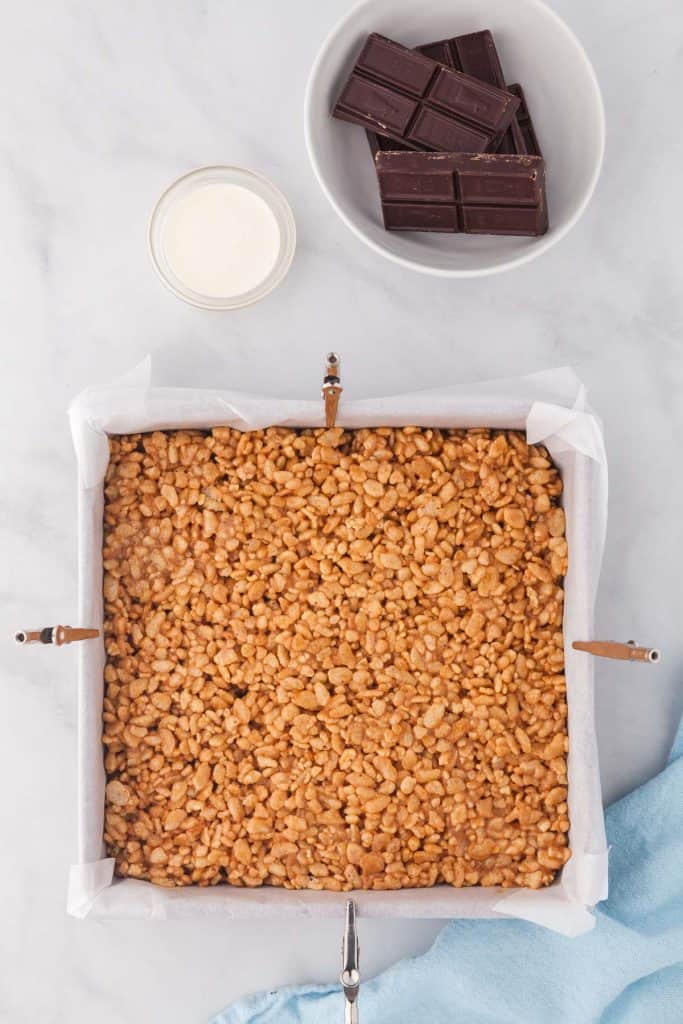
Prepare an 8×8 baking pan by lining it with parchment paper, making sure to leave at least two of the ends overhanging. Measure the peanut butter, maple syrup, corn syrup, and butter into a medium to large saucepan.
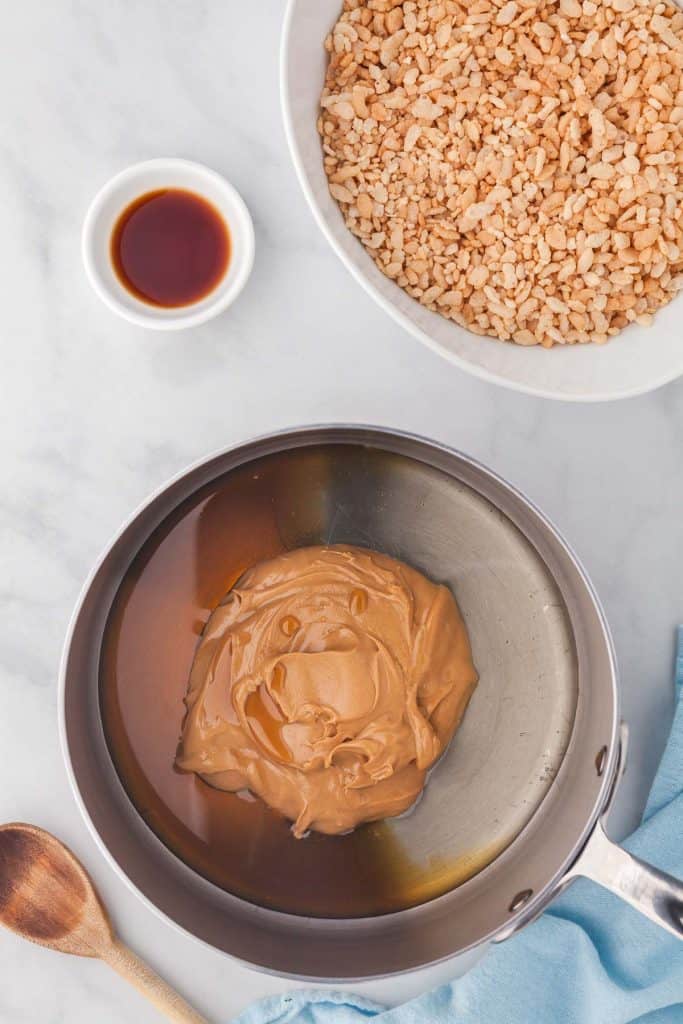
Place over the stovetop on medium heat. Use a wooden spoon to mix the ingredients together while the heat melts it all into a uniform mixture. Keep heating until the mixture around the edges begins to bubble and burst
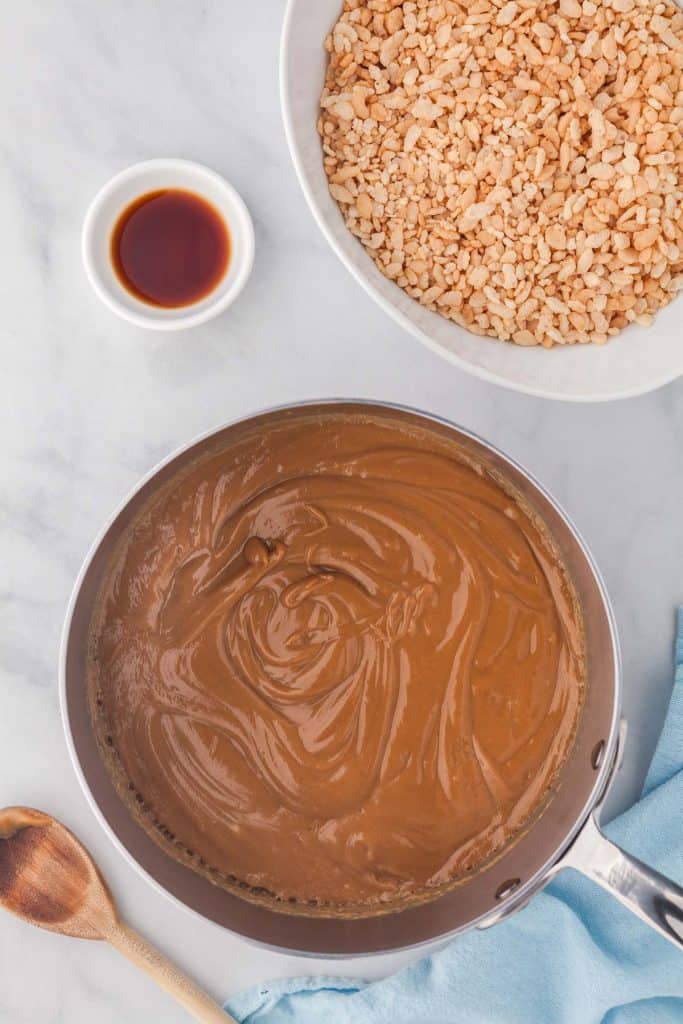
Remove the saucepan from the heat and mix in the vanilla extract. Pour in the Rice Krispies and stir everything together to a homogenous mixture. Pour the peanut butter rice krispie mixture into the prepared 8×8 baking pan. Use another piece of parchment to cover the top while you press down on the top with your hands to pack it in and smooth the top. Set aside on the counter.
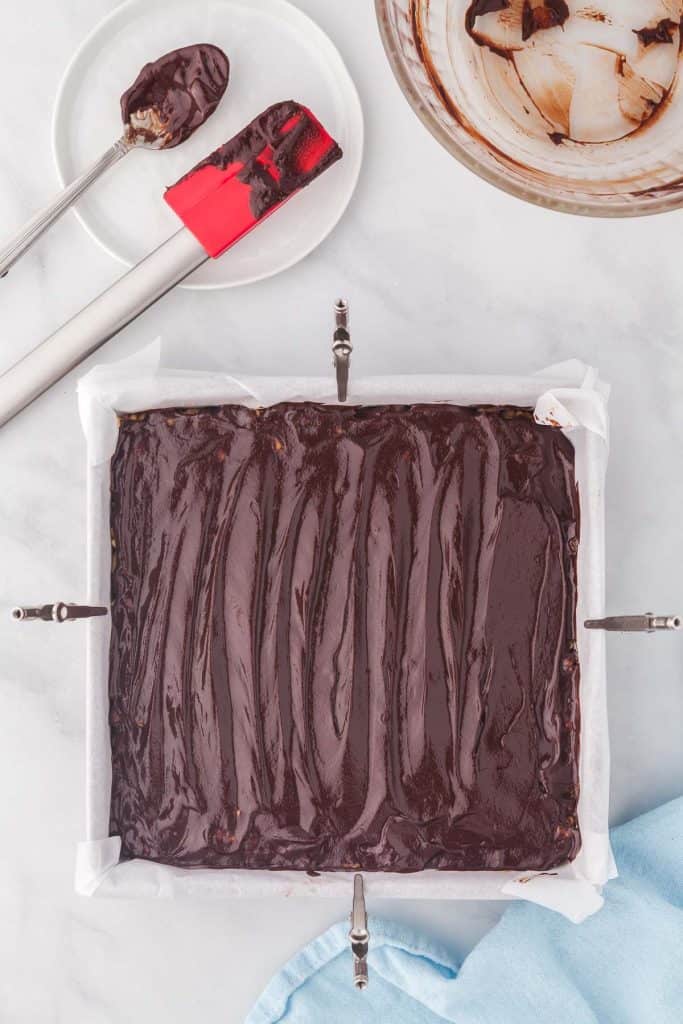
The safest way to make the chocolate topping without overheating is to use a double boiler. Place the chopped chocolate into a heat safe bowl that fits snuggly over a sauce pan with about an inch of gently simmering water. The chocolate will gently melt as you stir occasionally. Once fully melted remove the chocolate from the double boiler. I usually warm up the heavy cream with about 10 seconds in the microwave just to avoid adding a cold ingredient to the warm and melted chocolate. Add the warmed heavy cream to the chocolate and mix in thoroughly. Pour over the top of the peanut butter rice krispie squares. Use a rubber or offset spatula to smooth the chocolate layer over the entire surface.
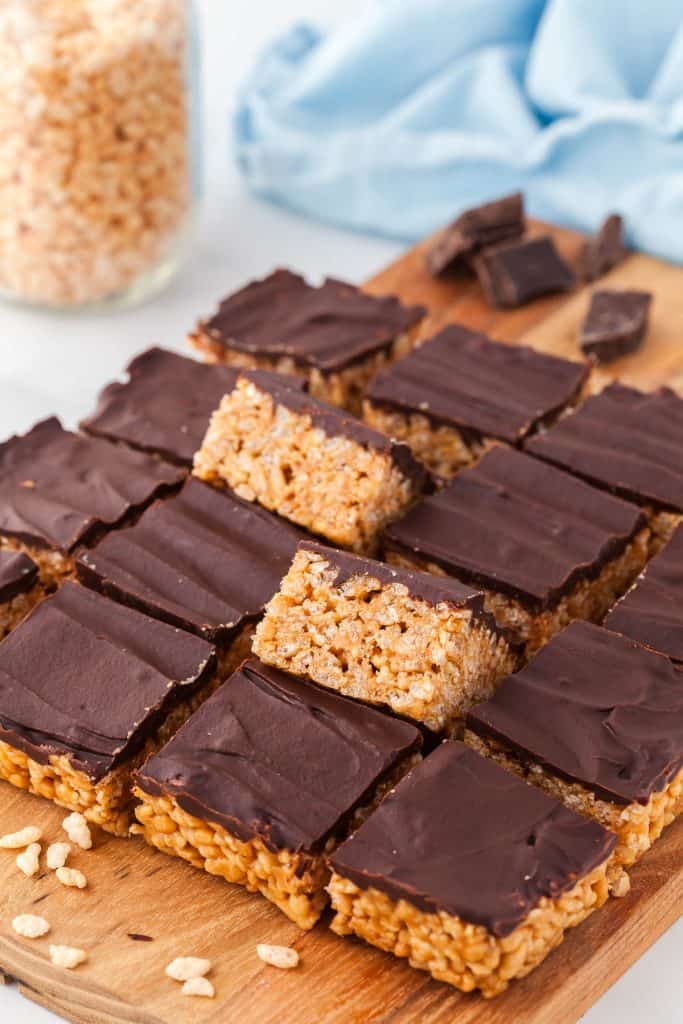
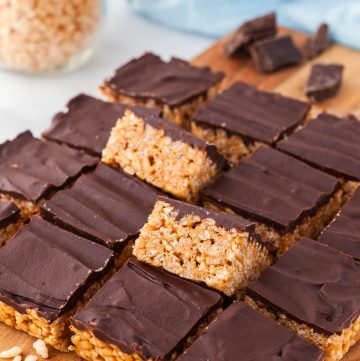
Place the pan in the fridge to chill and harden the chocolate and peanut butter rice krispie treats for 1 hour. Once fully chilled pull the chocolate peanut butter rice krispie treats out of the 8×8 pan with the aid of the overhanging parchment paper and cut into squares of your desired size. I recommend 16 squares. These yummy treats can be served at room temperature, straight out of the fridge, or even straight out of the freezer!
Notes
- Lining the baking pan with parchment paper helps to remove the squares from the pan, but if you don’t have any on hand you can get by without it. I would cut the squares in the pan and remove individually. The first one will be the trickiest.
- To avoid using marshmallows, this “sticky glue” which holds the square together is replaced with peanut butter, maple syrup, and corn syrup.
- If you want to make these vegan, choose a vegan appropriate dark chocolate and don’t add heavy cream to it. The chocolate top will be harder, but it is still great.
- When pressing the rice krispie mixture into the 8×8 pan, I find it help to cut a piece of parchment the same approximate size as the pan and placing it on top. You can press down on the parchment paper and nothing sticks.
Frequently Asked Questions
- What is the best way to store these rice krispie peanut butter chocolate treats? You can store the squares in an air tight container on the counter for three days, or put the container in the fridge for five days. If I need them to last longer I put the squares into a big Ziploc bag and into the freezer for up to three months.
- What do you serve with peanut butter and chocolate rice krispie treats? As a snack they go great with a glass of milk, but they are a great treat with your coffee or tea as well.
Peanut Butter Rice Krispie Squares
Equipment
- 8×8 Baking Pan
- 1 Parchment Paper
Ingredients
- 3/4 cup Smooth Peanut Butter (220g) – like Kraft or Jiffy, not the natural with oil on top.
- 1/4 cup Maple Syrup (78g)
- 1/4 cup Corn Syrup (81g) – white version
- 1 teaspoon Vanilla Extract
- 4 cups Crispy Rice Cereal (105g) – like Rice Krispies
For Chocolate Topping
- 4 oz Semi-sweet Chocolate, or dark chocolate of your choice – chopped
- 1 tablespoon heavy cream
Instructions
- Line an 8×8 baking pan with parchment paper and then set aside.
- In a medium sized saucepan add the peanut butter, maple syrup, and corn syrup. Heat over medium heat on the stove top with stirring until bubbles begin to form and pop around the edges of the pan.
- Remove saucepan from heat. Stir in the vanilla.
- Stir in the rice krispies.
- Pour the rice krispie mixture into the prepared 8×8 baking pan, and using a piece of parchment roughly the size of the baking pan press the rice krispie mixture down into the pan, being sure to press into the corners as well. Continue until you have a smooth surface on the top. Set the pan aside.
Chocolate Topping
- Add the chopped chocolate to the top of a double boiler. While the double boiler is boiling gently stir the chocolate occasionally until melted. Take off the double boiler and set aside.
- Warm the heavy cream in the microwave for 10 seconds
- Add the warm heavy cream to the melted chocolate mixture and stir until combined.
- Poor the melted chocolate mixture overtop of the rice krispie mixture in the 8×8 baking pan.
- Use a rubber spatula or offset spatula to spread the chocolate evenly around the entire surface
- Place in the fridge for at least one hour to chill
- Using the overhanging parchment paper, remove the entire dessert square and place on a cutting board.
- Cut into equal squares (I did 4×4 giving 16 squares)
- Serve and enjoy!
Notes
- Lining the baking pan with parchment paper helps to remove the squares from the pan, but if you don’t have any on hand you can get by without it. I would cut the squares in the pan and remove individually. The first one will be the trickiest.
- To avoid using marshmallows, this “sticky glue” which holds the square together is replaced with peanut butter, maple syrup, and corn syrup.
- If you want to make these vegan, choose a vegan appropriate dark chocolate and don’t add heavy cream to it. The chocolate top will be harder, but it is still great.
- When pressing the rice krispie mixture into the 8×8 pan, I find it help to cut a piece of parchment the same approximate size as the pan and placing it on top. You can press down on the parchment paper and nothing sticks.
I appreciate that this recipe omits marshmallows yet still delivers that incredible rice crispy texture.
Hi Stephanie, I’m glad you enjoyed them.
Now that the kids are back to school, my brain is drained trying to think of snack ideas. I think your peanut butter rice krispies recipe is just perfect!
I’m glad you think so!