
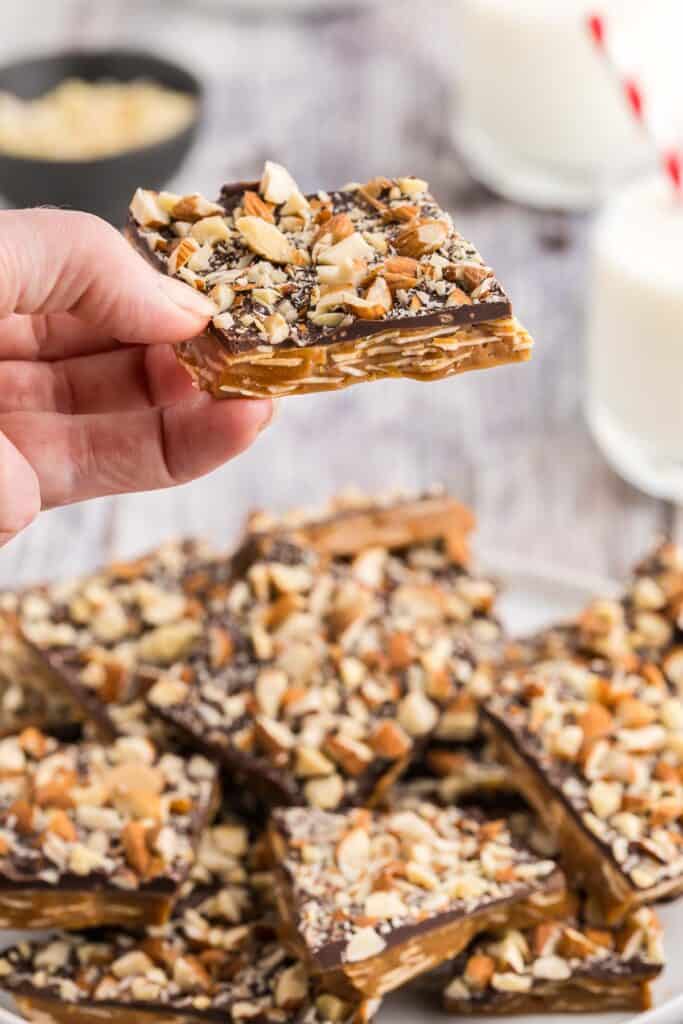
If you love a candy that crackles, crunches, and keeps you coming back for “just one more”, Buttercrunch is about to become your holiday obsession. It’s shockingly simple, wildly delicious, and dangerously giftable – because once people taste it, they’ll expect it every Christmas. But no need to stop enjoying buttercrunch at Christmas, you can make this all year round!
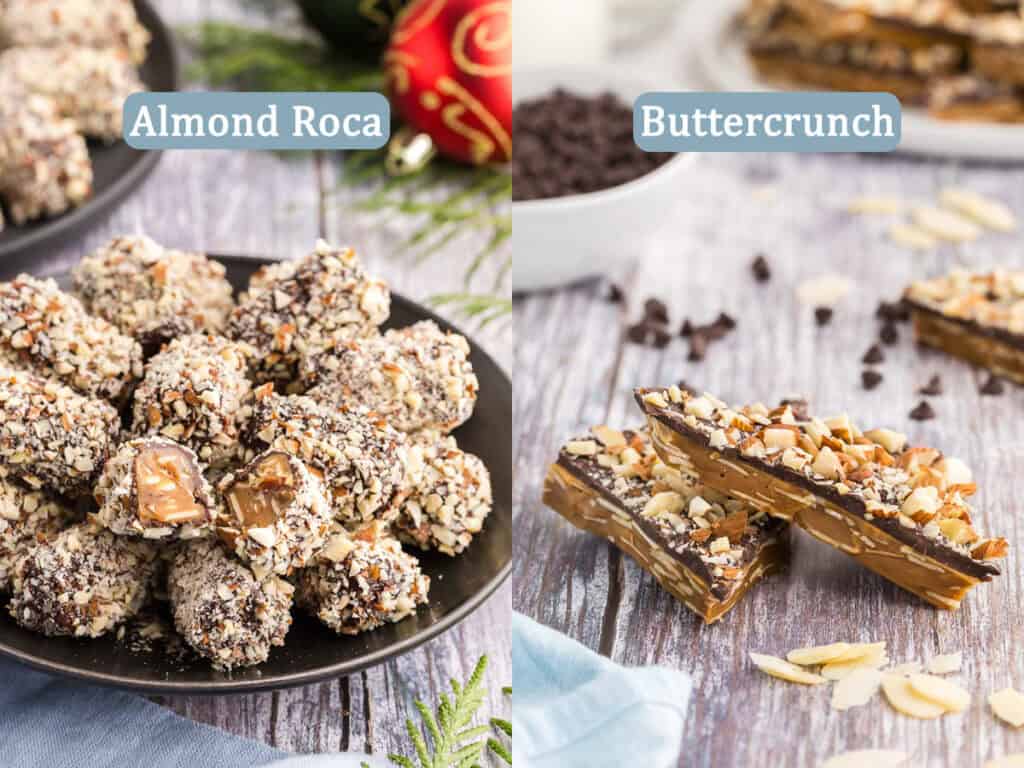
Buttercrunch and Almond Roca are very similar in terms of flavor and texture. They use the same ingredients, the only difference is in how you shape the final product. I have a post for Almond Roca and it requires you to have rod shaped silicone molds (which can be bought on Amazon), but buttercrunch is poured out into a baking pan and doesn’t require a silicone mold. Ultimately, this Buttercrunch recipe is easier and faster – you just have to decide which shape you prefer and then you can decide which recipe is right for you. These make a great addition into a Holiday Cookies Box too!
If you are looking for other recipes to make over the holidays you should check out my:
- Christmas Sugar Cookies
- Gingerbread Cookies
- Christmas Tree Meringues
- Almond Bark
- Chocolate Peppermint Cookies
- Raspberry Thumbprint Cookies
- Shortbread Cookies
Why You Will Love This Buttercrunch Recipe
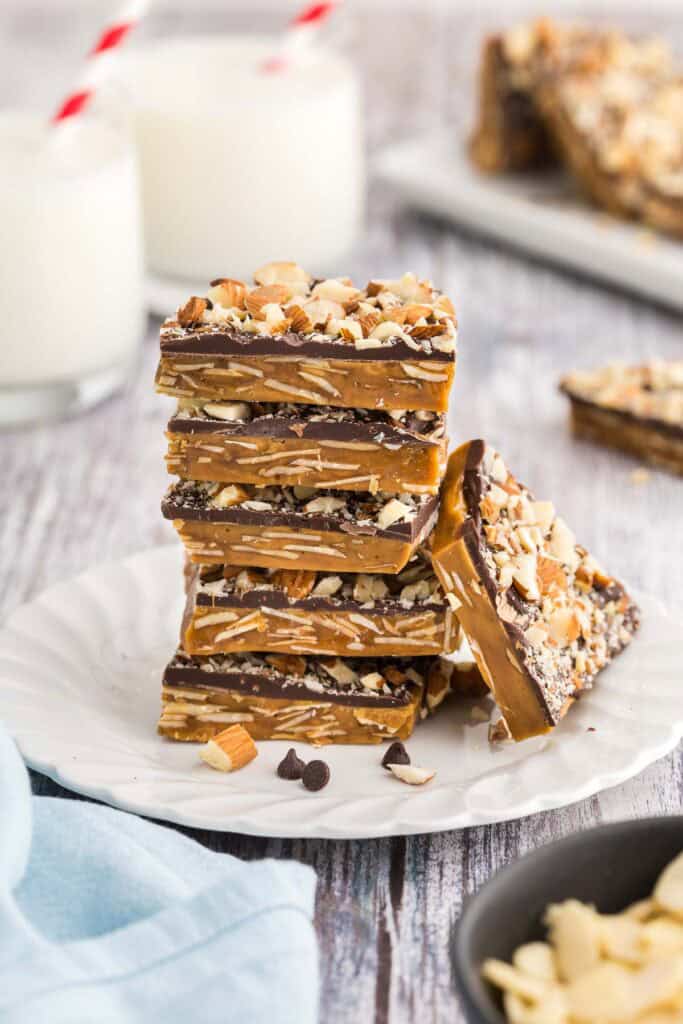
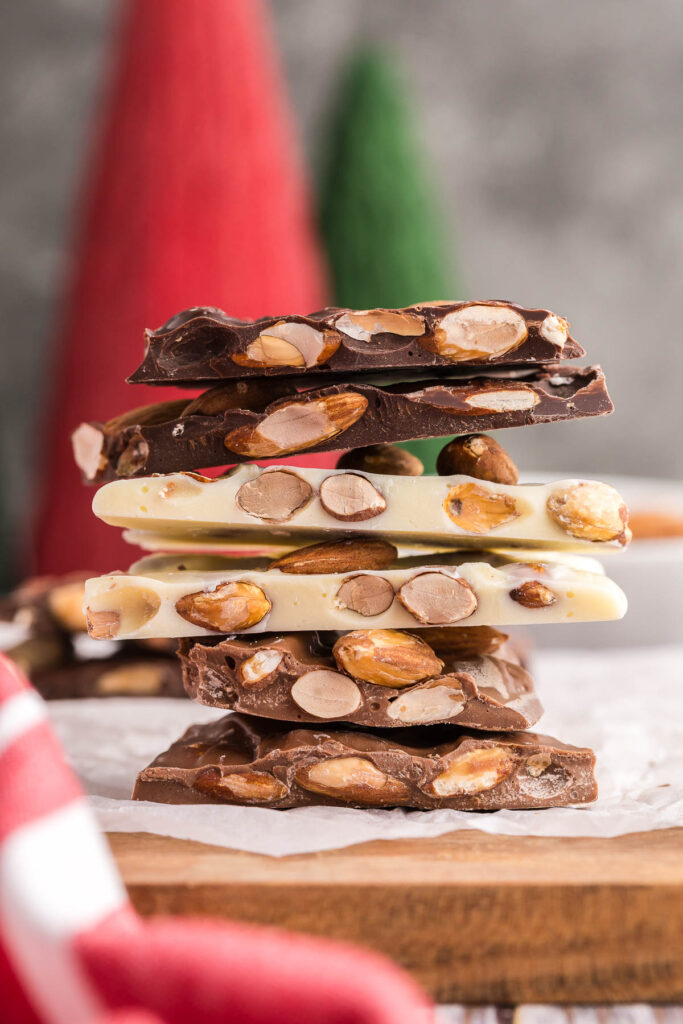
- Features a buttery crisp toffee layer topped with melted chocolate and finely chopped almond for the perfect crunch.
- Looks beautiful in Christmas cookie boxes and adds texture variety alongside softer cookies.
- Uses simple pantry ingredients but tastes like a gourmet confectionery treat.
- Breaks cleanly into pieces, making it easy to portion, package, and gift.
- Make ahead friendly, stays fresh for weeks when stored properly.
- Reliable cooking method that helps avoid grainy or sticky toffee.
- Naturally gluten-free, making it a great option when gifting to mixed groups.
- Perfect balance of sweet, nutty, and chocolatey without being overly sugary.
- Highly customizable – swap chocolate types, nut varieties, or toppings if desired.
Equipment Needed
Disclosure: as an Amazon affiliate, I receive a small amount of compensation from qualifying purchases at no expense to you. This helps support my work and allows me to bring more yummy recipes your way.
This recipe uses the following baking tools:
- Measuring Cups
- Good Quality 2 Qt Heavy Saucepan
- Candy Thermometer
- Parchment Paper
- 9×9 Baking Pan
- Offset spatula
- Rubber spatula
Ingredients
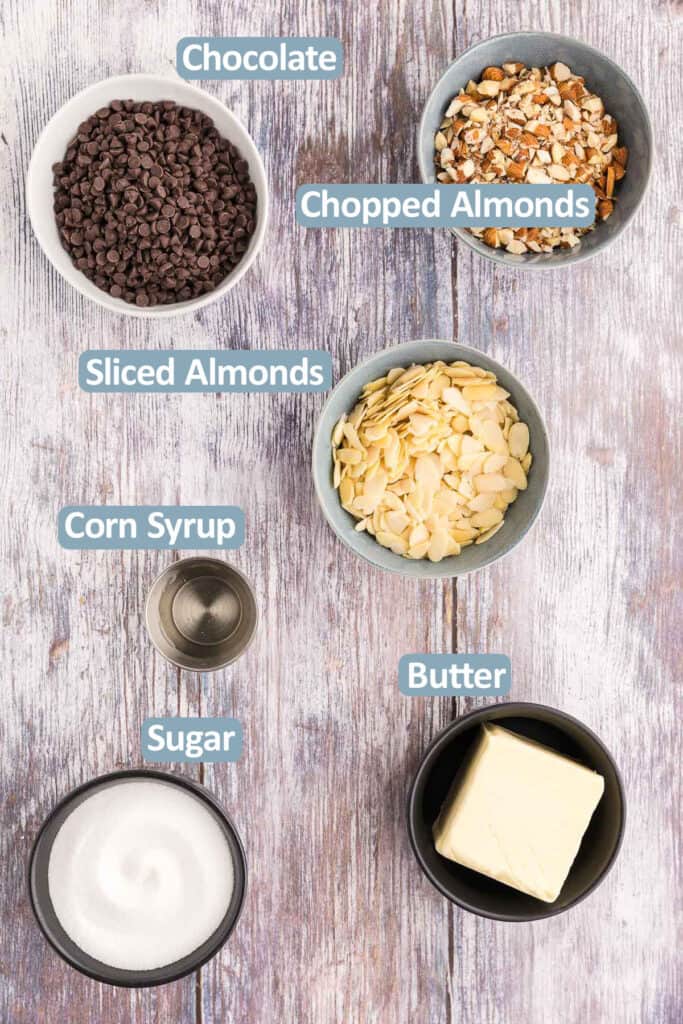
Salted Butter – One of three ingredients used to make the toffee – it is a must. I like using salted butter because I don’t have to worry about adding salt, and salt is need to act as a stabilizer to help prevent the butter and sugar from separating.
Granulated White Sugar – One of the other necessary ingredients to make the butter toffee. I haven’t tried this with brown sugar, but I know it works great with white sugar.
Corn Syrup – This ingredient is sort of like your insurance policy against grainy toffee. It helps to prevent the sugar from recrystallizing after it has dissolved. If you don’t have it, you can leave it out. See Pro Tips and Tricks for more info.
Sliced Almonds – Added to the hot toffee to give a nutty bite. Could be replaced with any nut of your choice.
Chocolate Chips – Melted to form a layer of chocolate on top of the toffee. See Pro Tips for substituions.
Finely Chopped Almonds – Used for the final coating on top of the melted chocolate. I didn’t toast these almonds, but you could.
If Cooking at Higher Elevations
If you live at higher altitudes, it is important to ready this section before starting.
When making Buttercrunch at sea level, your sugar and butter mixture will need to reach 310°F (154°C) (hard crack), since water boils at 212°F (100°C) in those conditions. At higher elevations, however, water boils at a lower temperature because of reduced atmospheric pressure, which means your hard-crack target will also be lower. The easiest way to know your adjustment is to boil a small pot of water and check its temperature with your thermometer. For example, if your water boils at 200°F, that’s 12°F below the sea-level standard. In that case, subtract 12°F from 310°F and cook your toffee to 298°F instead to achieve the same result.
How To Make Buttercrunch Candy
Making the Toffee
Line an 9×9 square baking pan with parchment paper so the ends hang over on two opposite sides. This will help with removal of the solid buttercrunch. Set the pan aside.
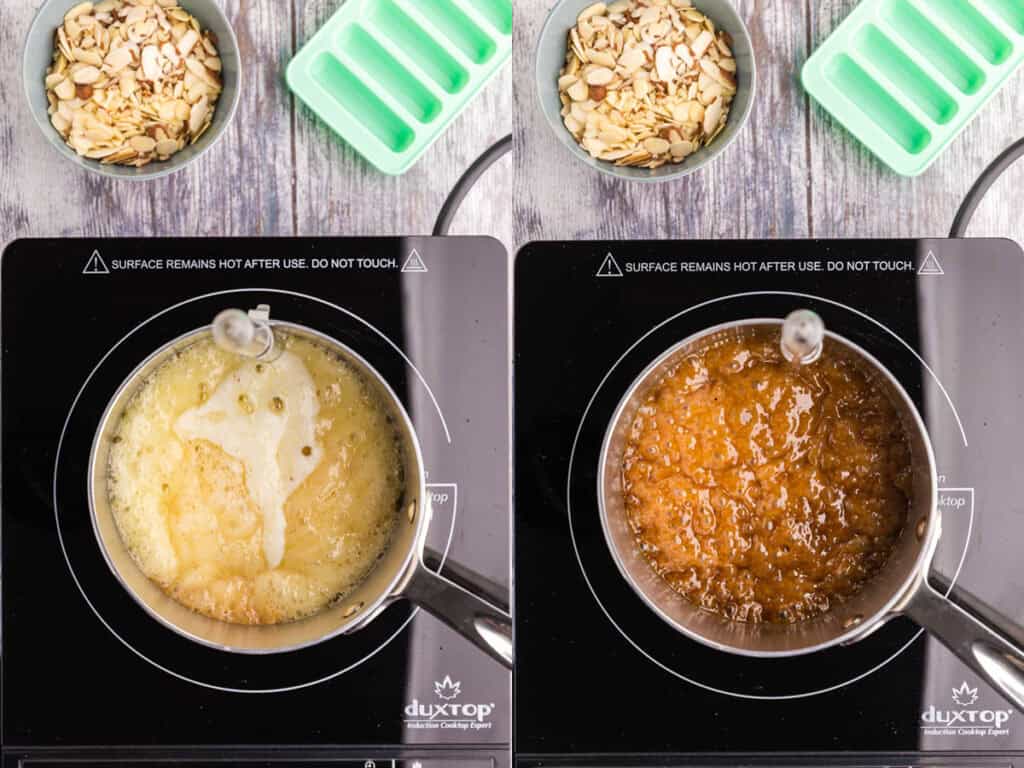
In a heavy bottom saucepan heat the butter, sugar, and corn syrup over medium/low heat with occasional stirring.
Once the butter is melted, increase the heat to medium. Gently stir every once in a while to distribute the heat evenly.
Once the mixture comes to a gentle boil, place a candy thermometer in the pot. Continue to gently stir occasionally to distribute the heat and prevent burning. The addition of corn syrup helps prevent the re-crystallization of the sugar during stirring. If you don’t add corn syrup, then you do not stir the mixture once it begins to boil gently.
Keep an eye on the thermometer. You want to bring the butter sugar mixture to the “hard crack stage” which is 310F. This assumes you are at sea level. If you are cooking at higher elevations make the necessary temperature adjustments as outlined in “If Cooking at Higher Elevations” above.
Assembling the Almond Roca
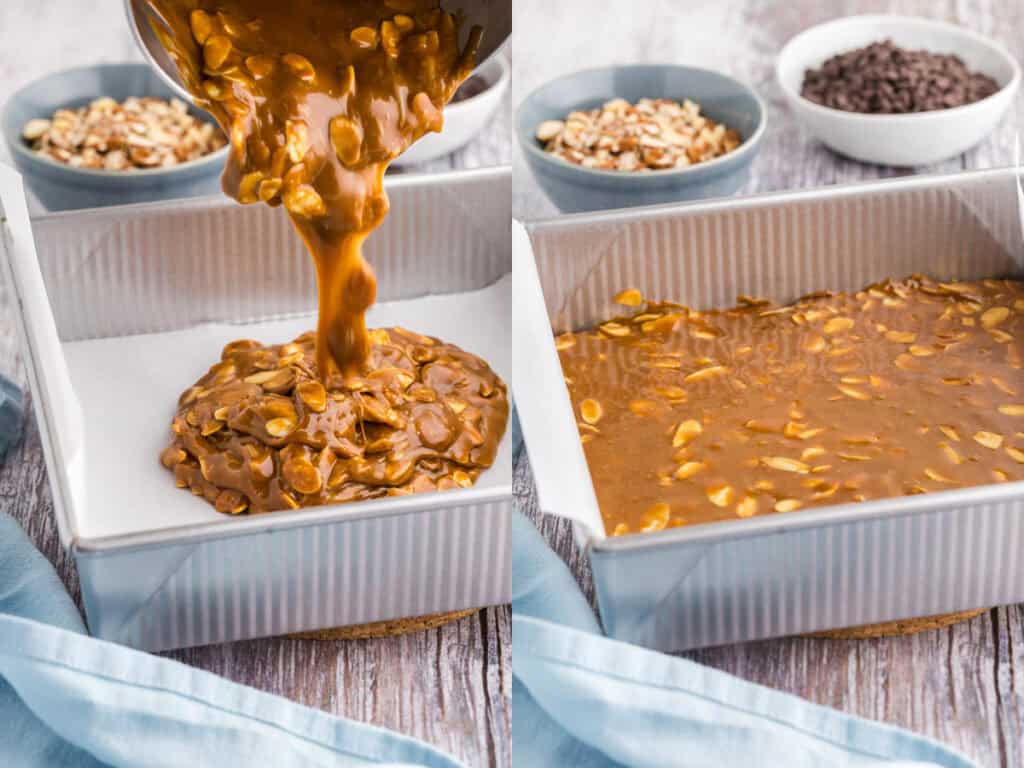
Once at 310F remove the pan from the heat. Be careful the mixture is very hot!!! Stir in the sliced almonds and then pour the mixture into the prepared baking pan and smooth it out with an offset spatula, or rubber spatula.
Allow the toffee to cool for 10-15 minutes.
If there is butter on the surface, blot it dry with a paper towel.
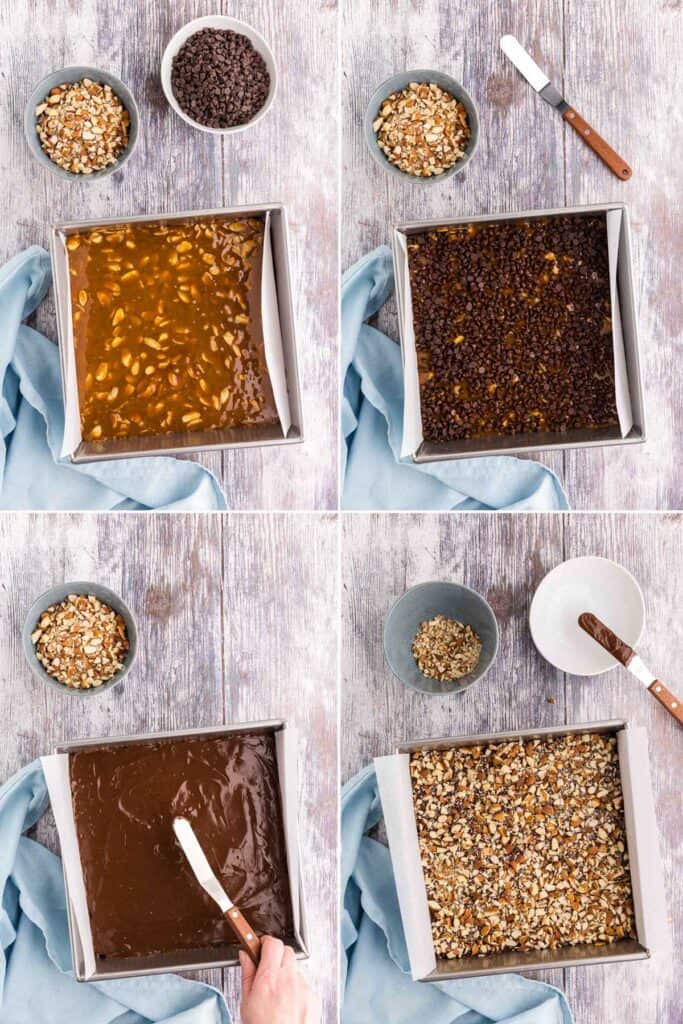
Sprinkle chocolate chips on the surface. Let it sit for 5-7 minutes. The heat from the toffee will melt the chocolate. Use an offset spatula to spread the melted chocolate evenly.
Sprinkle with chopped almonds. It can help to press the almonds down slightly to get them to stick better.
Let fully cool, about an hour, or you can place in the fridge for about 20 minutes.
Once fully cool, remove the butter crunch from the pan and place on a cutting board. You can use a knife to cut pieces, or you can break it into shards with your hands. Enjoy!
Pro Tips Tricks and Substitutions.
- Corn Syrup is added to help prevent sugar crystallization. Once the sugar is dissolved and the butter sugar mixture is boiling, people are tempted to stir it to prevent burning. Often, stirring can lead to recrystallization of the sugar which will give you a grainy texture in the end. Corn syrup helps to prevent this recrystallization. If you don’t have it, you don’t need to use it, but I highly recommend not stirring the simmering butter/sugar mixture. I don’t use it in my Almond Roca recipe.
- I use chocolate chips in this recipe, but you could also chop up your favorite solid chocolate bar. If you don’t want to use dark chocolate, you could replace with milk, white, or a mixture.
- An 8×8 baking pan could also be used, but your buttercrunch will be a little thicker.
FAQs
Why is the chocolate layer not sticking to the toffee layer? If you have a lot of butter pooled on the surface of the toffee and do not blot it away, the melted chocolate will have difficulties binding to the toffee. Be sure to remove any excess butter/fat.
Can I use nuts other then almonds? Yes, you can use any nuts you like in this recipe. Choose your favorite!
Can I omit corn syrup? Yes, you can. You just have to really refrain from stirring the simmering butter and sugar mixture. My almond roca recipe is very similar to this one, but I do not add corn syrup and it works just fine.
What if I don’t have a baking pan, can I still make buttercrunch? Yes, you can. You can pour the hot toffee on to another parchment lined surface. It doesn’t need to have edges, the toffee is thick enough to hold its own shape without sliding around too much. You just won’t have those clean edges, but it will taste exactly the same. Make sure the surface you choose can handle the heat of the toffee.
Buttercrunch
Equipment
- 1 Measuring Cups
- 1 Good Quality 2 Qt Heavy Saucepan
- 1 Candy Thermometer
- 1 Parchment Paper
- 1 9×9 Baking Pan
- 1 Offset Spatula
- 1 Rubber Spatula
Ingredients
- 1 cup Salted Butter (227g)
- 1 cup Granulated White Sugar (210g)
- 2 tablespoons Corn Syrup (42g)
- 1 cup Sliced Almonds (95g)
- 1 cup Chocolate Chips (6.3oz or 120g)
- 1 cup Chopped Almonds (with skins) (80g)
Instructions
- If you live at higher altitudes, it is important to ready this section before starting.When making Buttercrunch at sea level (where water boils at 212°F (100°C)), your sugar and butter mixture will need to reach 310°F (154°C). At higher elevations, however, water boils at a lower temperature because of reduced atmospheric pressure, which means your hard-crack target will also be lower. The easiest way to know your adjustment is to boil a small pot of water and check its temperature with your thermometer. For example, if your water boils at 200°F, that's 12°F below the sea-level standard. In that case, subtract 12°F from 310°F and cook your toffee to 298°F instead to achieve the same result.
- Line an 9×9 square baking pan with parchment paper so the ends hang over on two opposite sides. This will help with removal of the solid buttercrunch. Set the pan aside.
- In a heavy bottom saucepan heat the butter, sugar, and corn syrup over medium/low heat with occasional stirring.
- Once the butter is melted, increase the heat to medium. Gently stir every once in a while to distribute the heat evenly.
- Once the mixture comes to a gentle boil, place a candy thermometer in the pot. Continue to gently stir occasionally to distribute the heat and prevent burning. The addition of corn syrup helps prevent the re-crystallization of the sugar during stirring. If you don't add corn syrup, then you do not stir the mixture once it begins to boil gently.
- Keep an eye on the thermometer. You want to bring the butter sugar mixture to the “hard crack stage” which is 310F. This assumes you are at sea level. If you are cooking at higher elevations make the necessary temperature adjustments as outlined above.
- Once at 310F remove the pan from the heat. Be careful the mixture is very hot!!! Stir in the sliced almonds and then pour the mixture into the prepared baking pan.
- Allow the toffee to cool for 10-15 minutes.
- If there is butter on the surface, blot it dry with a paper towel.
- Sprinkle chocolate chips on the surface. Let it sit for 5-7 minutes. The heat from the toffee will melt the chocolate. Use an offset spatula to spread the melted chocolate evenly.
- Sprinkle with chopped almonds. You can press gently on the almond surface to make sure the almonds are well seated in the chocolate.
- Let fully cool, about an hour, or you can place in the fridge for about 20 minutes.
- Once cool, remove the buttercrunch from the pan using the overhanging parchment paper as handles and place on a cutting board. Use a knife to cut into your preferred sizes, or break into shards with your hands.
- Enjoy
Notes
- Corn Syrup is added to help prevent sugar crystallization. Once the sugar is dissolved and the butter sugar mixture is boiling, people are tempted to stir it to prevent burning. Often, stirring can lead to recrystallization of the sugar which will give you a grainy texture in the end. Corn syrup helps to prevent this recrystallization. If you don’t have it, you don’t need to use it, but I highly recommend not stirring the simmering butter/sugar mixture. I don’t use it in my Almond Roca recipe.
- I use chocolate chips in this recipe, but you could also chop up your favorite solid chocolate bar. If you don’t want to use dark chocolate, you could replace with milk, white, or a mixture.
- An 8×8 baking pan could also be used, but your buttercrunch will be a little thicker.
Follow Me On Social Media
If You Liked This Buttercrunch Recipe…
If you liked this recipe, please consider rating the recipe and leaving a comment below – I love to hear how people get on with my recipes and I truly make an effort to respond to everyone who takes the time to comment. Other recipes you might enjoy include:


Shut the front door, this stuff was amazing, I need to make another batch asap!!!
Hi Stephanie, thanks for commenting. It really is delicious, glad you thought so too!
Amazingly delicious!!! Making again!
Hi Misty, glad you liked them. They are pretty addictive.
Made the buttercrunch tonight, glass-shiny snap and that toasted almond crunch. So addictive I had to hide a few pieces for gifting!
Hi Abi, thanks for commenting. Glad you were able to hide some for gifting!
This was so good! I ended up leaving out the corn syrup because I didn’t have any and it worked great.
Yes, you can leave out the corn syrup if you don’t have. glad it worked out, you just have to remember to refrain from stirring once it is simmering away.
Oh my word! The perfect holiday treat! Definitely making again!
Glad you enjoyed it!
This was awesome! I am going to make some more for my holiday trays that I had out to the neighbours, I think they will love it too!
Hi Eva, I’m so glad you liked the buttercrunch – hopefully the neighbors enjoyed it as much!
Candy that crackles, crunches, and is shockingly easy to make? Yes, please! I can see why it would become a Christmas tradition.
You will love it!