
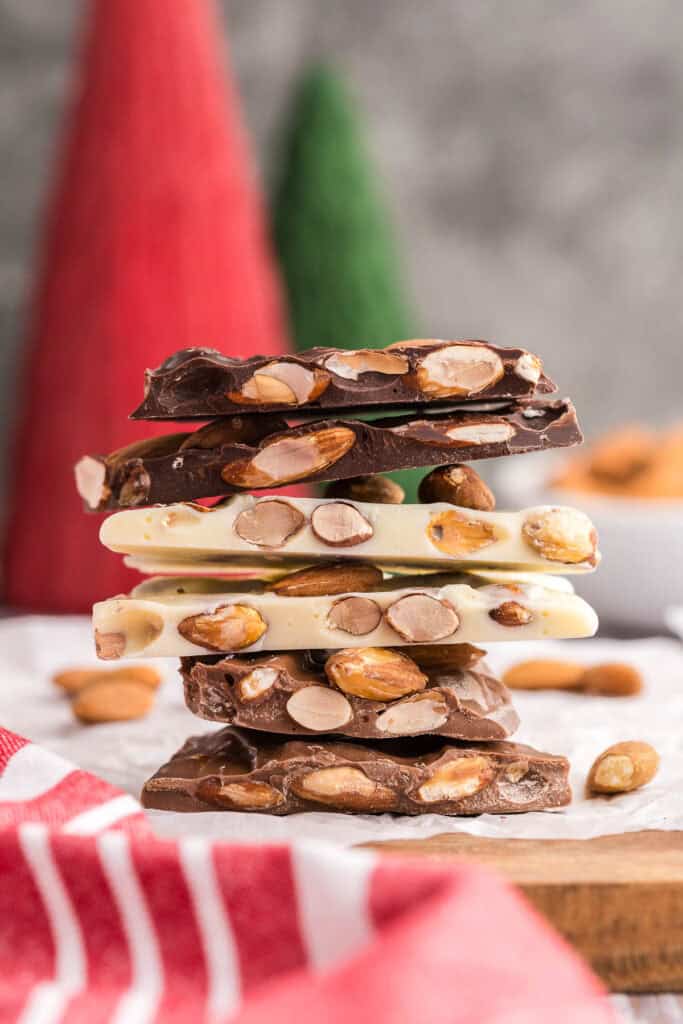
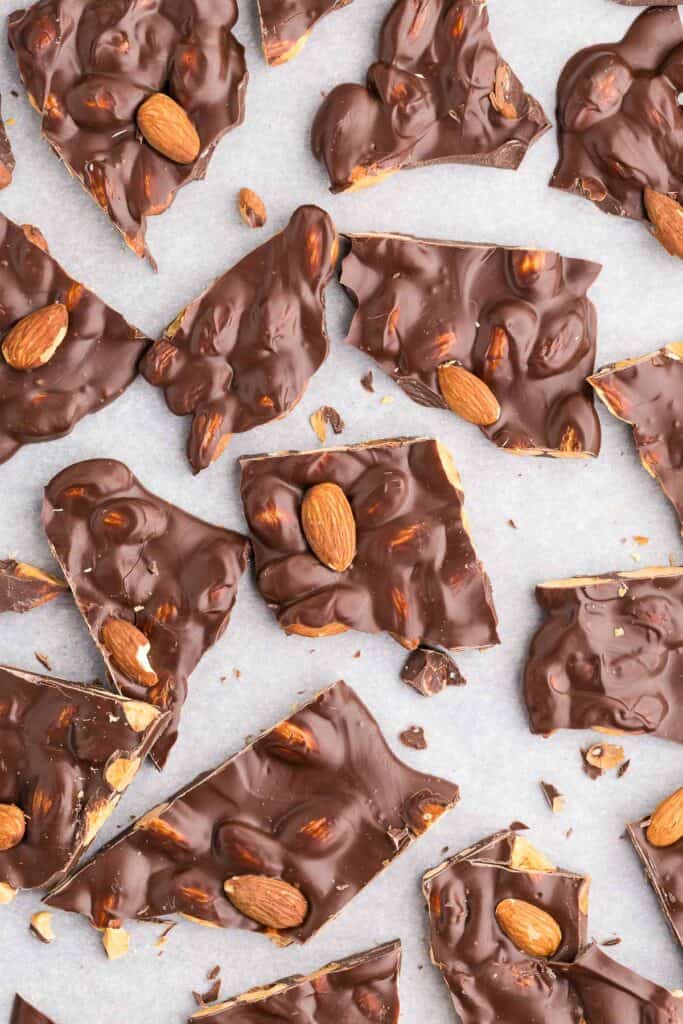
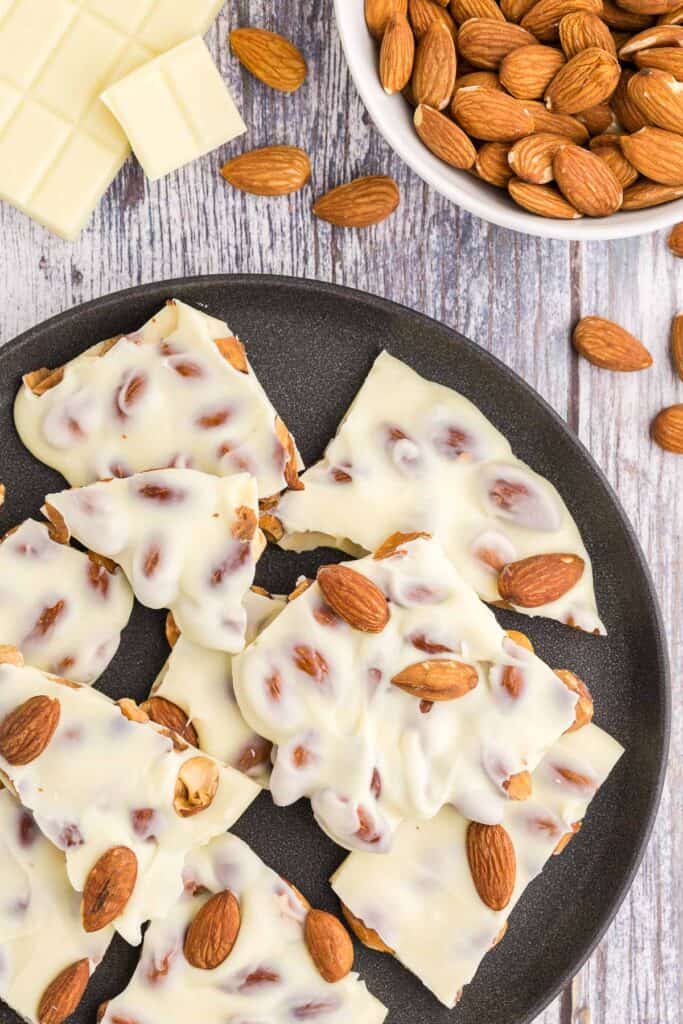
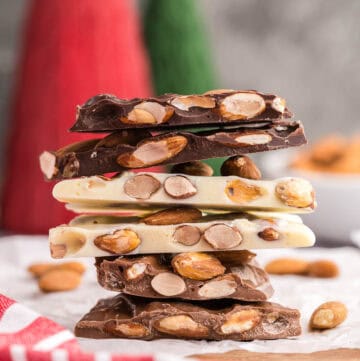
Almond bark is the kind of treat that looks and tastes impressive but is actually fairly straightforward to make. Melt chocolate, add almonds, and let it set up into chocolate-covered perfection. Whether you’re craving the sweetness of white chocolate, the creamy richness of milk chocolate, or the bold intensity of dark chocolate, this recipe adapts to your mood and pantry.
This recipe is fairly straightforward and uses only two ingredients, so I suggest using the best ingredients you can muster. My preference is good quality couverture chocolate, but you can also melt down your favorite solid chocolate bars like Lindt, Cadbury Dairymilk, Hershey’s etc. If you enjoy eating that brand of chocolate then you will enjoy using it in the almond bark recipe. Yes, you could use candy melts that are chocolate flavor – they will melt well and make a nice looking bark, but it won’t be as pleasant to eat.
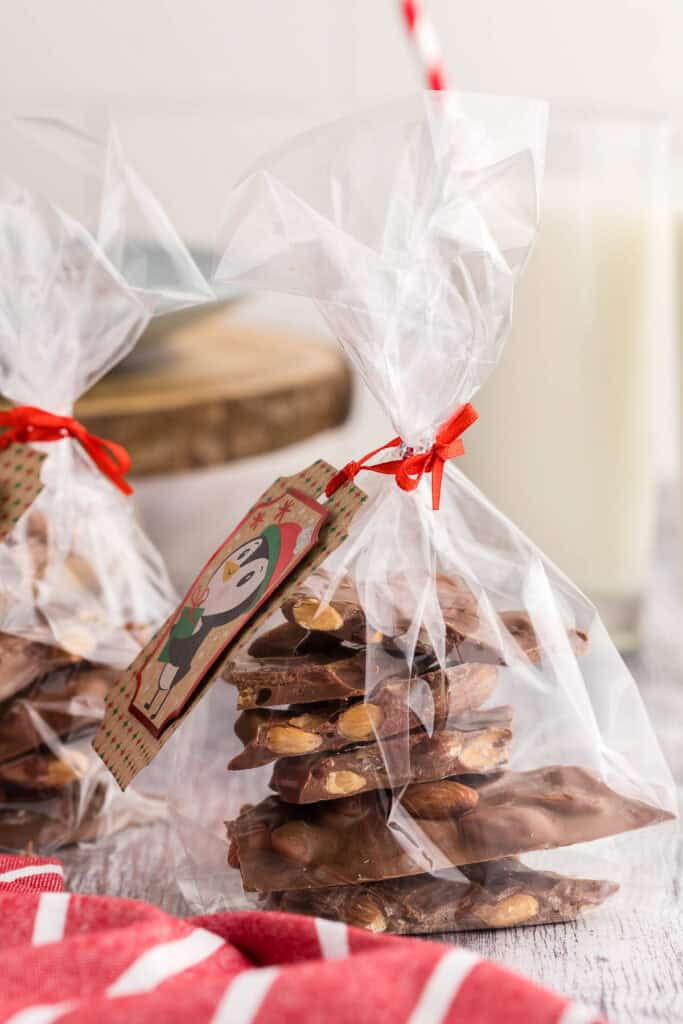
If gifting homemade holiday cheer is up your alley, consider adding this almond bark to a Holiday Cookies Gift Box. My post goes over how to do this from start to finish. Other holiday cookies you might enjoy include:
- Christmas Sugar Cookies
- Gingerbread Cookies
- Christmas Tree Meringues
- Almond Roca or Buttercrunch
- Chocolate Peppermint Cookies
- Raspberry Thumbprint Cookies
- Shortbread Cookies
Why You Will Love This Chocolate and Almond Bark Recipe
- Customizable Chocolate Options – use white, milk, or dark chocolate to match any craving (or swirl to mix).
- Minimal Ingredients – Just chocolate and almonds. No candy thermometer or complicated steps.
- Fast to Make – Melts, mixes, and sets quickly – perfect for last-minute treats or gifting.
- Perfect for Gifting – Break into pretty shards, package in bags or tins, and you have an almost effortless holiday gift.
- Crunchy & Chocolatey – The mix of silky chocolate and toasted almonds gives every bite a satisfying snap and crunch.
- Naturally Gluten-Free – A crowd-pleasing treat that works for many dietary needs.
- Endless Variations – Add sea salt, dried fruit, peppermint, sprinkles – whatever fits the mood/season.
Equipment Needed
Disclosure: as an Amazon affiliate, I receive a small amount of compensation from qualifying purchases at no expense to you. This helps support my work and allows me to bring more yummy recipes your way.
This recipe uses the following baking tools, and a few standard kitchen items not listed.
- Measuring Cups
- Microwave Safe Plastic Bowl
- Rubber Spatula
- Parchment Paper
- Baking Sheet
- Offset Spatula
Ingredients
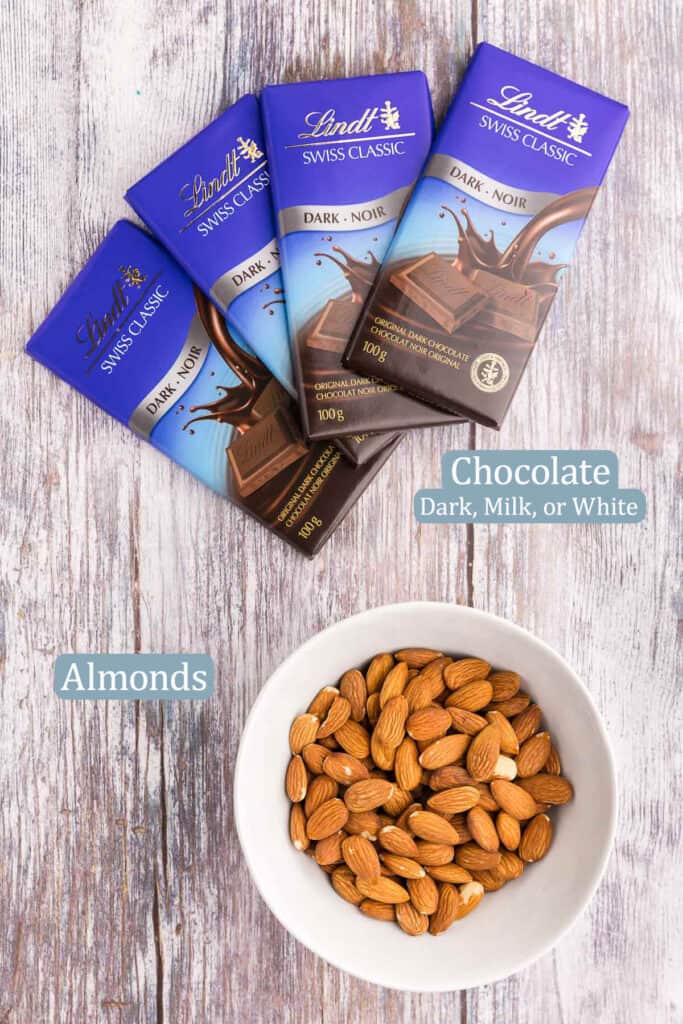
Chocolate – the base – pick your favorite.
Almonds – adds crunch and almond flavor
How To Make Almond Bark
Toast the Almonds
Preheat oven to 350 F
Place almonds on a baking sheet in a single layer and place in oven for 20-25 minutes. After 10 minutes give the almonds a flip/stir and bake for another 5 minutes. Stir/flip the almonds again, and give them another 5 minutes. You should be able to smell the toasted almonds when the pan is out of the oven. If they aren’t too brown you can decide to give them another 5 minutes, just keep a close eye on them – they can go from toasty to burnt quickly.
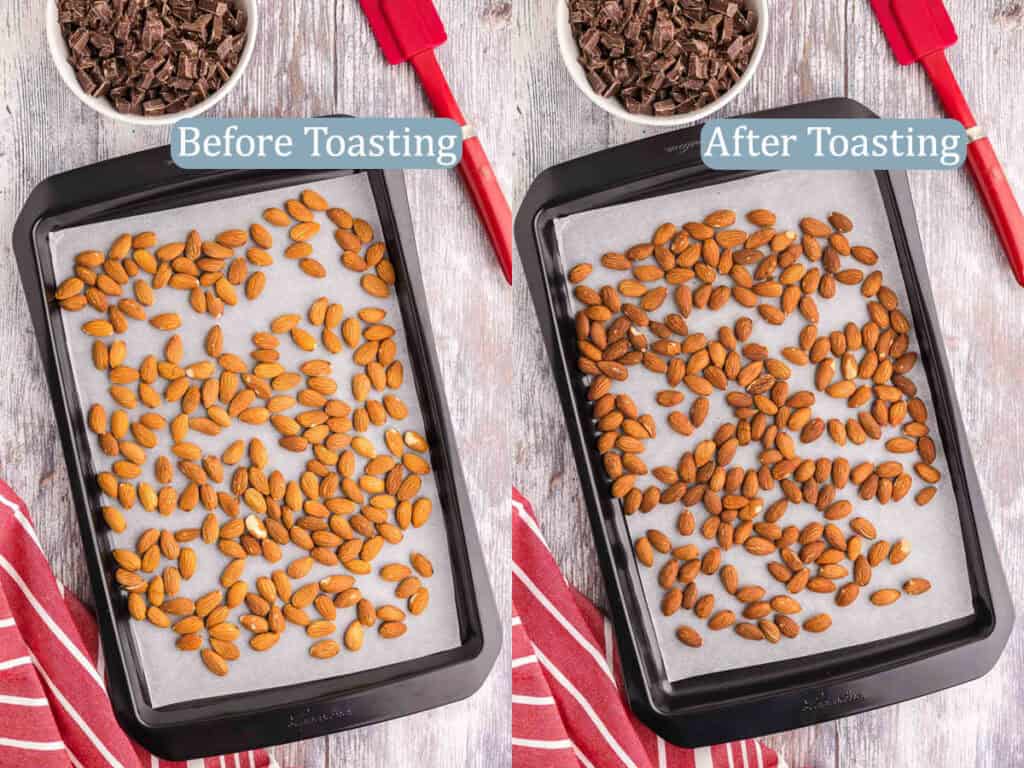
Set almonds aside to cool.
Melting the Chocolate – Whether using Couverture or Non-Couverture Chocolate.
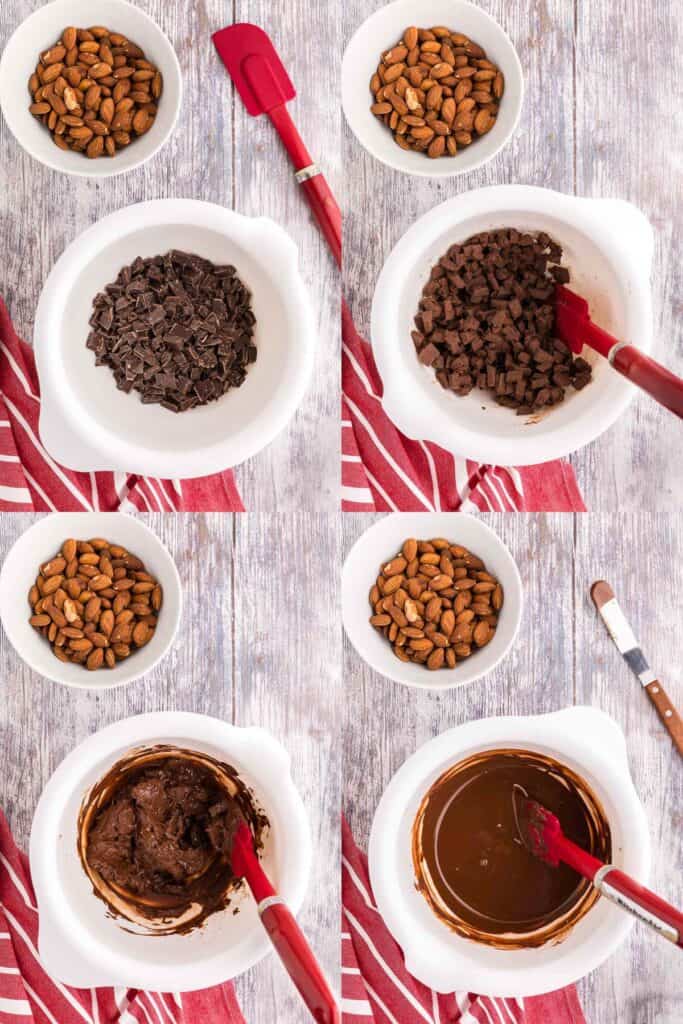
If using solid chocolate, chop it up into very small bits. If using chips no need to chop them up. Place chocolate in a microwave safe plastic bowl. See Pro Tips on why plastic is better than glass for melting chocolate.
Place bowl of chocolate in the microwave and microwave for 45 seconds. Give the chocolate a thorough stir to help distribute the heat, even if it looks like nothing melted. Place back in the microwave for 30 seconds then stir again. Now use 20 second bursts in the microwave with a lot of stirring between bursts until you get to the point that most of the chocolate has melted but some small chunks remain. Continue to stir and stir until those chunks finally melt. If they are being stubborn, give them a 5-10 second burst in the microwave.
Assembling the Almond Bark
Line a baking sheet with parchment paper and set aside.
Add the toasted almonds into the bowl of melted chocolate, reserving about a 1/4-1/2 cup of almonds that you will sprinkle on top (optional). It is ok if they are warm, but you don’t want them to be hot as that can overheat the chocolate.
Stir to completely coat the almonds in the chocolate.
Pour the chocolate almond mixture onto the prepared baking sheet and use an offset spatula to even out the layer.
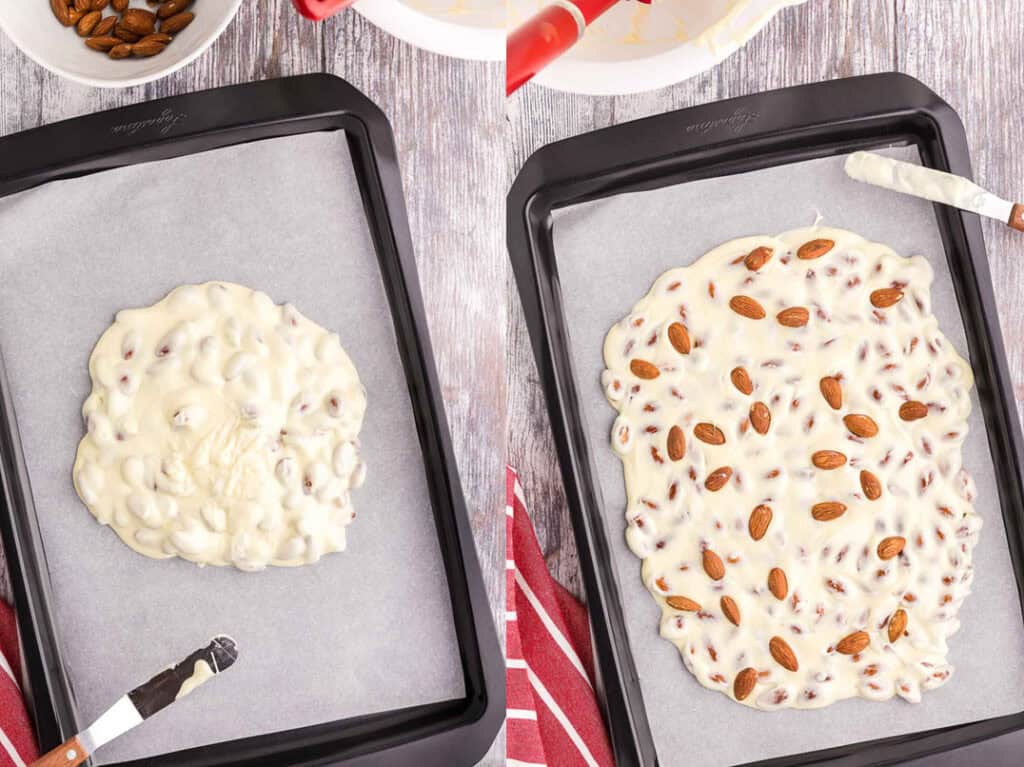
Sprinkle the top of the melted chocolate with the leftover almonds (optional). Give them a little press down so they will be held tightly by the chocolate when it solidifies.
Allow to cool until solid. At least 20 minutes.
Pro Tips Tricks and Substitutions
- Melting chocolate in the microwave is one of the simplest ways to melt chocolate and keep it in temper, but it requires careful attention. Chocolate is extremely sensitive to heat – just a small amount of overheating can cause issues such as bloom (white streaks or blotches) or a dull, soft finish without that satisfying snap. Using a plastic bowl instead of glass helps prevent this, since plastic doesn’t hold residual heat the way glass does. Once the bowl is removed from the microwave, the temperature of the chocolate won’t continue to rise as quickly, giving you more control.
- I don’t like to put chocolate in the fridge to set up, as chocolate can be temperamental to temperature shocks. So just be patient and let it cool and harden at room temperature. However, if you live somewhere hot, you may need to use the fridge.
FAQs
What is almond bark? I have always understood almond bark to be a slab of chocolate with almonds inside and on top and it is broken into shards. But some stores sell a candy confection called almond bark, which doesn’t actually have almonds in it, but you melt it down and almonds are added to it. I think this is basically equivalent to candy melts but in bar form. I’ll take real chocolate over that any day.
Can I use chocolate chips? Yes, you can use chocolate chips to make this recipe.
Why are there white blotches, or streaks in my chocolate? This means the chocolate went out of temper. This can happen if you heat the chocolate up too high. It is not unsafe to eat, it just doesn’t look as nice. If you want to learn more about tempering chocolate I go in to more detail in my Dubai Chocolate post.
What do I do if my chocolate starts to solidify before I can spread it out? This happened to me. I poured my milk chocolate almond mixture onto the baking sheet and as I was trying to spread it out, it became apparent that it had lost its “flow” and was starting to solidify. I tried putting the baking sheet into a warm oven of 200F which allowed me to spread it again, but it also took the chocolate out of temper a bit – it got too hot, especially on the edges. I should have tried to put it all back in the plastic bowl and into the microwave for a few short bursts, even with the almonds, and poured it out again onto fresh parchment.
Almond Bark
Equipment
- 1 Measuring Cups
- 1 Microwave Safe Plastic Bowl
- 1 Rubber Spatula
- 1 Parchment Paper
- 1 Baking Sheet
- 1 Offset Spatula
Ingredients
- 12 oz Chocolate (white, milk or dark)
- 1 ½ cup Almonds (raw with skins on)
Instructions
Toast the Almonds
- Preheat oven to 350 F
- Place almonds on a baking sheet in a single layer and place in oven for 20-25 minutes. After 10 minutes give the almonds a flip/stir and bake for another 5 minutes. Stir/flip the almonds again, and give them another 5 minutes. You should be able to smell the toasted almonds when the pan is out of the oven. If they aren't too brown you can decide to give them another 5 minutes, just keep a close eye on them – they can go from toasty to burnt quickly.
- Set almonds aside to cool.
Melting the Chocolate – whether using Couverture or non-couverture chocolate.
- If using solid chocolate, chop it up into very small bits. If using chips no need to chop them up. Place chocolate in a microwave safe plastic bowl. See notes on why plastic is better than glass for melting chocolate.
- Place bowl of chocolate in the microwave and microwave for 45 seconds. Give the chocolate a thorough stir to help distribute the heat, even if it looks like nothing melted. Place back in the microwave for 30 seconds then stir again. Now use 20-10 second bursts in the microwave with a lot of stirring between bursts until you get to the point that most of the chocolate has melted but some chunks remain. Continue to stir and stir until those chunks finally melt.
Assembling the Almond Bark
- Line a baking sheet with parchment paper and set aside.
- Add the toasted almonds into the bowl of melted chocolate, reserving about a 1/4-1/2 cup of almonds that you will sprinkle on top (optional). It is ok if they are warm, but you don’t want them to be hot as that can overheat the chocolate.
- Stir to completely coat the almonds.
- Pour the chocolate almond mixture onto the prepared baking sheet and use an offset spatula to even out the layer.
- Sprinkle the top of the melted chocolate with the optional leftover almonds. Give them a little press down so they will be held tightly by the chocolate when it solidifies.
- Allow to cool until solid. At least 20 minutes.
Notes
- Melting chocolate in the microwave is one of the simplest ways to temper or melt chocolate, but it requires careful attention. Chocolate is extremely sensitive to heat – just a small amount of overheating can cause issues such as bloom (white streaks or blotches) or a dull, soft finish without that satisfying snap. Using a plastic bowl instead of glass helps prevent this, since plastic doesn’t hold residual heat the way glass does. Once the bowl is removed from the microwave, the temperature of the chocolate won’t continue to rise as quickly, giving you more control.
- I don’t like to put chocolate in the fridge to set up, as chocolate can be temperamental to temperature shocks. So just be patient and let it cool and harden at room temperature. However, if you live somewhere hot, you may need to use the fridge.
Follow Me On Social Media
If You Liked This Almond Bark Recipe…
If you liked this recipe, please consider rating the recipe and leaving a comment below – I love to hear how people get on with my recipes and I truly make an effort to respond to everyone who takes the time to comment. Other recipes you might enjoy include:

I loved this! Thank you!
Hi Misty, glad you enjoyed it.
How pretty and simple! Definately making them for this holiday season!
I know right?! So simple, yet delicious and impressive looking.
I love this recipe so much. I will be making is for gifting over the holidays
Everyone I know loves almond bark, I hope your friends and family enjoy it too!
This Almond Bark sounds fantastic! Simple to make yet so delicious. I’m saving this for holiday baking.
Hi Madhu. Good idea, your friends and family will be happy you did!
This was so easy to make and will be a great addition to my holiday cookie boxes.
Almond bark is a great addition to holiday cookie boxes, and like you said, easy to make too!
I was looking for an easy treat to make for some last-minute holiday house guests and was so happy to find this recipe! I ended up swirling together dark and white chocolate for the bark and sprinkled a little flaky sea salt on top and it was perfect.
Hi Courtney, I love the idea of swirling the dark and white chocolate, I bet it looked amazing. And flaky sea salt would be a perfect addition too!