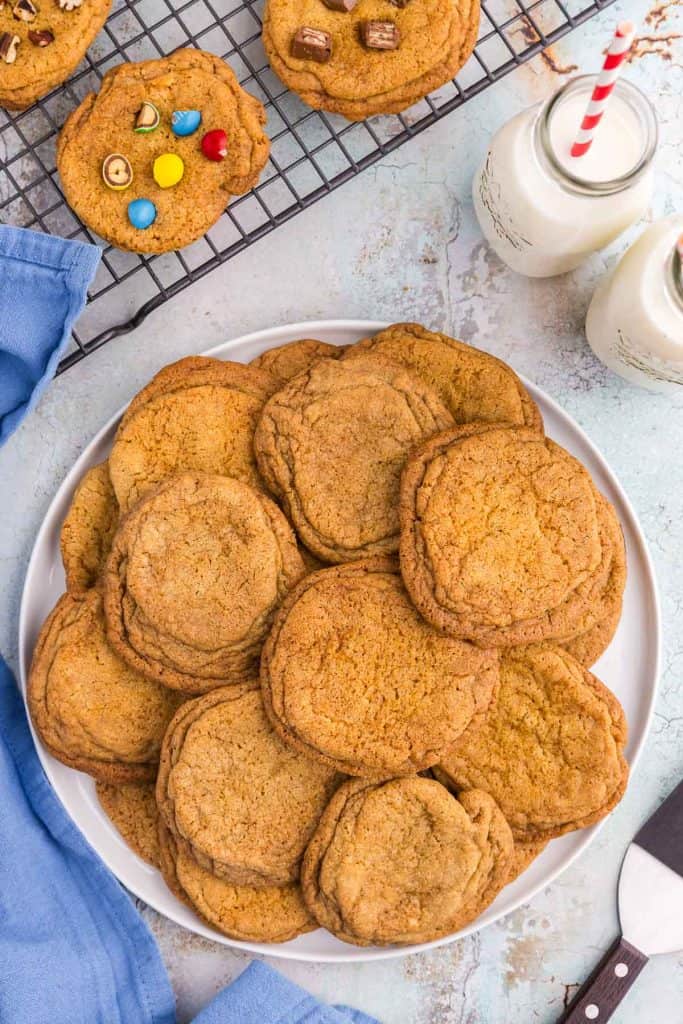
Chocolate Chipless Cookies
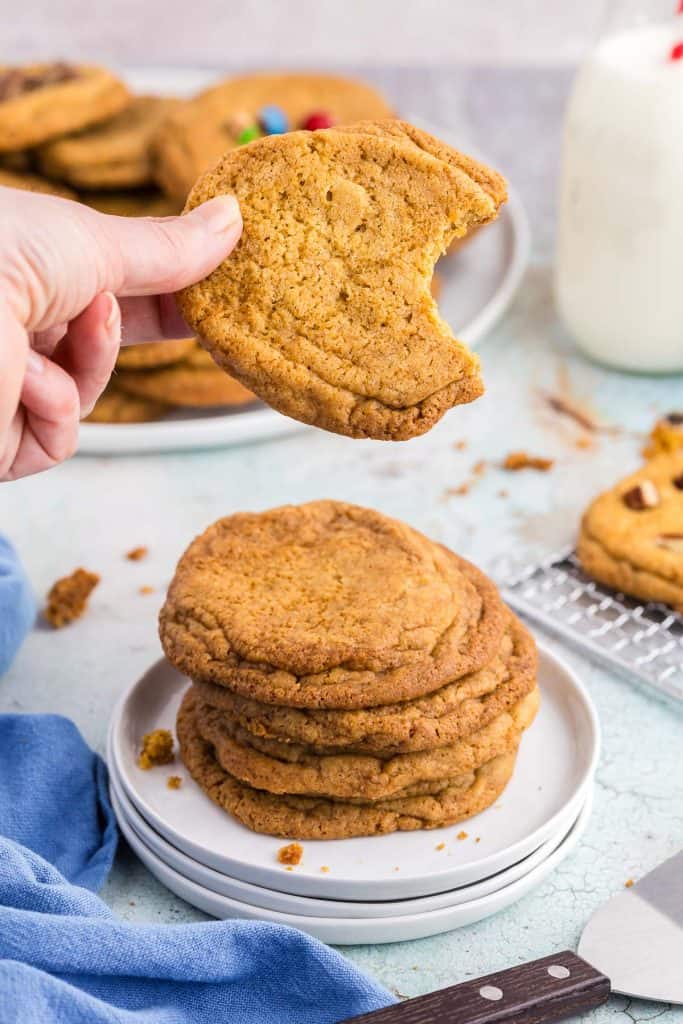
Lots of people love a classic chocolate chip cookie - but what if you took out the chips? These chipless cookies let the buttery, brown sugar dough shine all on its own. Soft, chewy, and rich with vanilla flavor, they're perfect for chip-avoiders, dough purists, or anyone who's ever picked the chocolate out of their cookie (you know who you are). If you've ever snuck a scoop of dough before adding the chips, this recipe is for you.
First off, I should be upfront on this one. I like chocolate chips in my cookies. I like almonds in my cookies. I like pecans in my cookies. I like toffee bits in my cookies. And, I like nothing in my cookies. I guess the subject of cookies is not black and white for me, and probably many others out there too. Throw in your family and their wants and desires, and it will be difficult to make a cookie to please everyone...until now...sort of.
This chocolate chipless cookie recipe is sort of like a blank slate. They are delicious all on their own, but this recipe also shows you how you can make one batch of cookies to please everyone (I hope). And how to get nuts into some cookies while keeping others completely nut free for nut allergy folks. Sounds too good to be true? Well read on.
The secret, which isn't really a secret, is to not add mix-ins until after the cookies have baked! What!? It's mind blowing, but it works, and it allows you to make one batch of cookies into so many types, and even keeps nuts out until you've made enough nut-free cookies.
What You Will Love About This Chocolate Chipless Cookie Recipe
- They are delicious as is
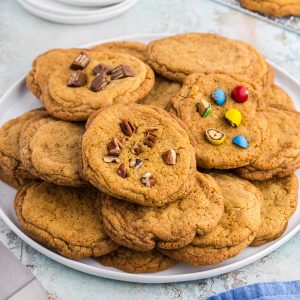
- You can make one batch with as many different toppings as you like - making everyone in your household happy.
- Easy ingredient list
- Quick and easy to make
- Dough can be made the ahead of time the day before if you want
- Cookies freeze well.
Equipment Needed
Disclosure: as an Amazon affiliate, I receive a small amount of compensation from qualifying purchases at no expense to you. This helps support my work and allows me to bring more yummy recipes your way.
- Mixing Bowl
- Hand Held Mixer or Stand Mixer
- Measuring Spoons
- Measuring Cups
- Rubber Spatula Spoon
- Sheet Pan
- Parchment Paper or Sil Pat (this fits a half sheet pan)
- Cooling Rack
Ingredients for Chocolate Chipless Cookies

Butter - needs to be at room temperature for best results.
Brown Sugar and White Sugar - adds sweetness and moisture to the cookies. The brown sugar also adds caramel undertones to the flavor of the cookies.
Egg and Egg Yolk - helps with structure, adds moisture and chewiness to the cookie.
Vanilla Extract and Almond Extract - adds flavor nuances
All-purpose Flour - provides the framework for the cookie structure
Baking Soda - leavening agent to help the cookie rise and also helps with browning.
Baking Powder - leavening agent and also hinders the cookies spreading too much.
Cornstarch - adds softness to the cookie
Add-ins (optional) like: nuts, toffee, caramel chunks etc - for different flavor profiles.
How to Make Chocolate Chipless Cookies
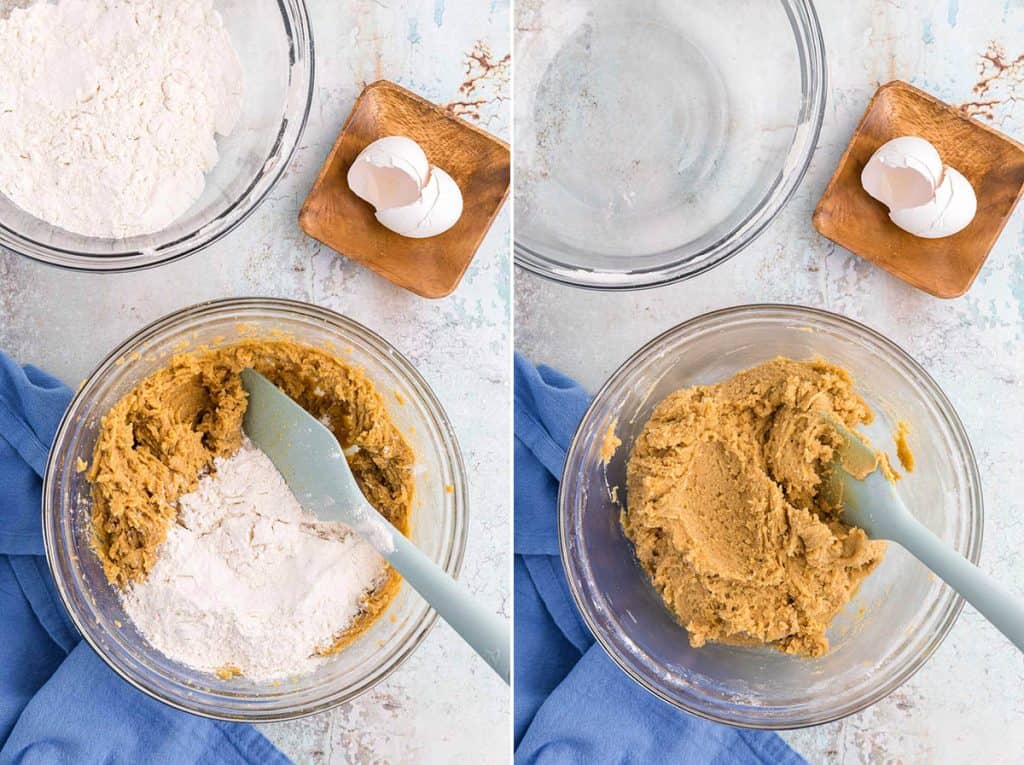
Combine the flour, baking soda, baking powder, and cornstarch in a large bowl and mix with a spoon. Set aside.
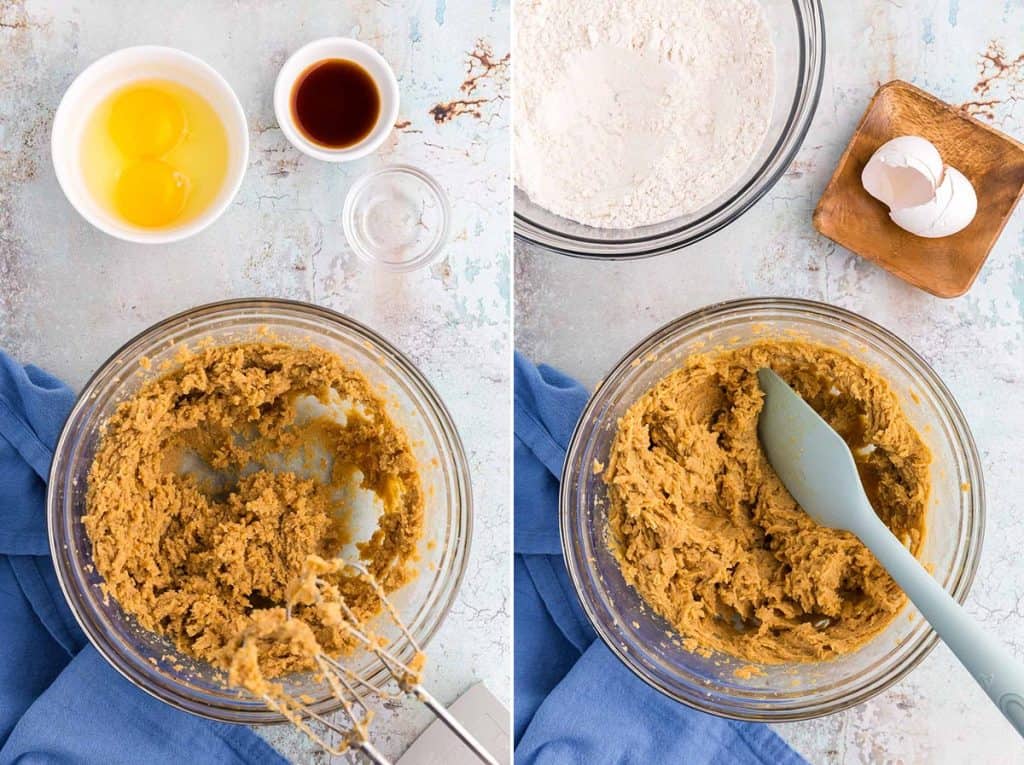
In another mixing bowl, cream together the butter with the brown and white sugar using a hand held mixer or stand mixer until nice and fluffy about 2 minutes.
Add in the egg and egg yolk, vanilla extract, and almond extract and beat to combine, scraping the bowl down as necessary with a rubber spatula.
Add the dry ingredients into the wet ingredients in two batches. Mix in with a wooden spoon or rubber spatula spoon.
Cover the dough with plastic wrap and place in the fridge for at least 1 ½ hours to chill. See notes
Preheat oven to 350F just before the dough is ready to be used.
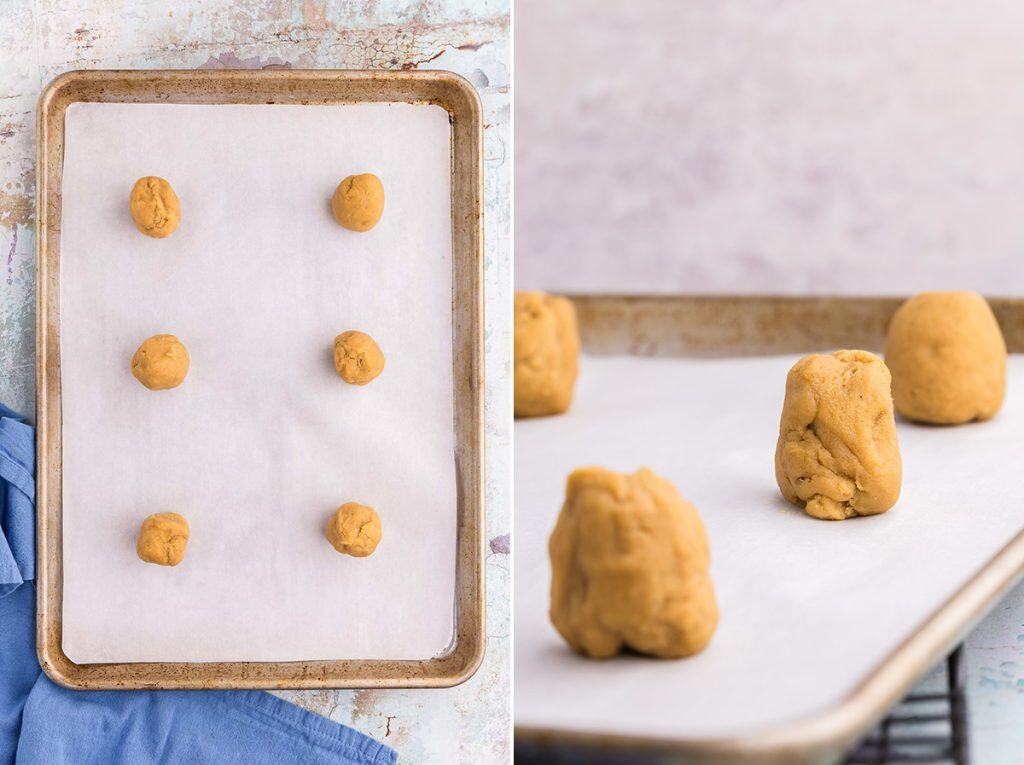
To make uniform size cookies use a cookie scoop to scoop out equal portions of dough approximately 45g in weight. Gently roll the dough in your hands to form a tall ball (taller than it is wider) and place on a parchment lined baking sheet (or line with a sil pat). Leave enough room for the cookies to spread and not spread into each other - about 3 inches apart.
For Thinner-style Cookies
Bake in a 350F oven for 15 minutes. The edges should be golden brown.
For thicker style cookies
Bake in a 350F oven for 11 minutes. Remove the pan from the oven and use the back of a spoon to gently nudge the edges of the cookies back towards the middle. This will counteract the spreading of the cookie and build up the volume in the middle. It also adds a bit of ridges which gives the cookies an appealing texture.
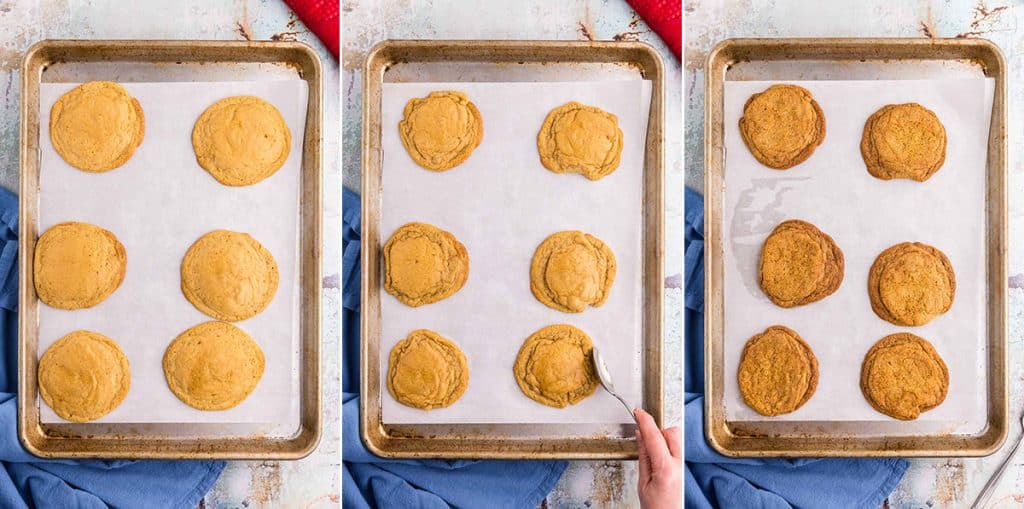
Place back in the oven and continue cooking. How long you bake for will depend how long the cookies were out of the oven. As the cookies cool down, it will take more time back in the oven to get back up to temperature. I usually have to bake the cookies for another 8 minutes. Keep an eye on them, they are ready when the edges are golden brown.
Whether doing thinner or thicker cookies, remove from the oven when golden brown and if you want you can again use a spoon to gently push the edges of the cookies towards their centers while the cookies are still warm to counteract spreading (optional).
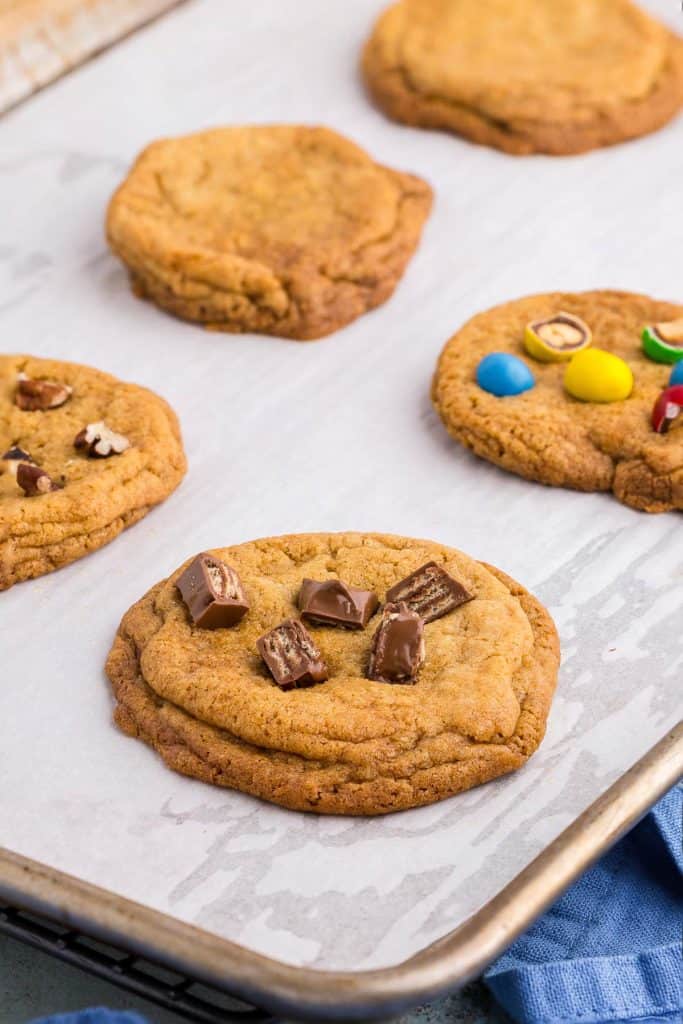
At this point you can also sprinkle on any toppings to any of the cookies that you would like - see notes. After adding these ingredients to the tops, I press them down a bit into the still-soft dough so they get sort of glued into place as the cookie cools. The heat of the cookie will be enough to turn chocolate items melty.
If you are baking for someone with nut allergies, bake all the nut free cookies first, and put them in a safe contamination-free place, then bake the cookies that will have nuts added to the tops.
Cookies are best served warm, so dig in and enjoy!
Notes
- Chilling the dough helps to prevent too much spread during baking. But using the back of a spoon during and after baking also helps to bolster up the cookie. The longer you can chill the dough the better (even overnight), but 1 ½ hours is enough.
- This recipe allows you to customize each and every cookie if you like, or you can leave them all as is for the purists at heart. You can add any toppings you want, like toffee bits, caramel bits, pecans, almonds, even chocolate chips (I won't tell anyone you made chocolate chipless cookies with chocolate chips). If you're adding nuts, I like to toast them first, then chop them before sprinkling on top of the cookies.
FAQs
Can I omit the almond extract? Yes, the almond extract just adds a little extra flavor, but can be omitted if you don't have any, or are baking for someone with nut allergies.
What is the best way to store leftover chocolate chipless cookies? These cookies can be stored in an airtight container on your counter for 3 days or so, or in the fridge for about 5 days. They can also be frozen in an airtight container or zipper top bag for up to 3 months. They only take about 5 minutes to thaw.
Can I make the dough ahead of time? Yes, you can chill the dough overnight and make the cookies the next day.
Can I freeze the cookie dough? Yes, you could wrap the dough in plastic wrap and place in an airtight container or zipper top bag and place in the freezer for up to three months. When ready to bake you can thaw it on the counter for about an hour, or overnight in the fridge.
Chocolate Chipless Cookies
Equipment
- 1 Mixing bowl
- Measuring Spoons
- Measuring Cups
- Rubber Spatula Spoon
- Sheet Pan
- Parchment Paper or Sil Pat
- Cooling Rack
Ingredients
- 1 cup Butter salted
- 1 cup Brown Sugar (173g)
- ½ cup White Sugar (104g)
- 1 large Egg
- 1 large Yolk
- 1 ½ teaspoons Vanilla Extract
- ½ teaspoon Almond Extract
- 2 cups All-purpose Flour (266g)
- 1 teaspoon Cornstarch
- ¾ teaspoon Baking Soda
- ¼ teaspoon Baking Powder
- ¾ cup Add-ins (nuts, toffee, chocolate chips etc) (optional)
Instructions
- Combine the flour, baking soda, baking powder, and cornstarch in a large bowl and mix with a spoon. Set aside.
- In another mixing bowl, cream together the butter with the brown and white sugar using a hand held mixer or stand mixer until nice and fluffy about 2 minutes.
- Add in the egg and egg yolk, vanilla extract, and almond extract and beat to combine, scraping the bowl down as necessary with a rubber spatula.
- Add the dry ingredients into the wet ingredients in two batches. Mix in with a wooden spoon or rubber spatula spoon.
- Cover the dough with plastic wrap and place in the fridge for at least 1 ½ hours to chill. See notes
- Preheat oven to 350F when dough is almost fully chilled.
- To make uniform size cookies use a cookie scoop to scoop out equal portions of dough approximately 45g in weight. Gently roll the dough in your hands to form a tall ball (taller than it is wider) and place on a parchment lined baking sheet (or line with a sil pat). Leave enough room for the cookies to spread and not spread into each other - about 3 inches apart.
- For a thinner style cookie bake in a 350F oven for 15 minutes. The edges should be golden brown. Then continue on from step 10.
- For a thicker style cookie bake in a 350F oven for 11 minutes. Remove the pan from the oven and use the back of a spoon to gently nudge the edges of the cookies back towards the middle. This will counteract the spreading of the cookie and build up the volume in the middle. It also adds a bit of ridges which gives the cookies an appealing texture. Place the pan back in the oven as quickly as possible and continue to cook for another 5-8 minutes, until the cookies are golden brown on the edges.
- Remove from the oven and if you want you can use a spoon to gently push the edges of the cookies towards their centers, so they aren't as spread out. This is up to your personal preference (thinner vs thicker cookie).
- At this point you can also sprinkle on any toppings to any of the cookies that you would like. See notes. After adding these ingredients to the tops, I press them down a bit into the still-soft dough so they get sort of glued into place as the cookie cools. The heat of the cookie will be enough to turn chocolate chips melty.
- If you are baking for someone with nut allergies, bake all the nut free cookies first, and put them in a safe contamination-free place, then bake the cookies that will have nuts added to the tops.
- Cookies are best served warm, so dig in and enjoy!
Notes
-
- Chilling the dough helps to prevent too much spread during baking. But using the back of a spoon during and after baking also helps to bolster up the cookie. The longer you can chill the dough the better (even overnight), but 1 ½ hours is enough.
- This recipe allows you to customize each and every cookie if you like, or you can leave them all as-is for the purists at heart. You can add any mix-ins you want, like toffee bits, caramel bits, pecans, almonds, even chocolate chips (I won't tell anyone you made chocolate chipless cookies with chocolate chips). If you're adding nuts, I like to toast them first, then chop them before sprinkling on top of the cookies.
Follow Me On Social Media
If You Liked This Chocolate Chipless Cookie Recipe...
If you liked this recipe, please consider rating the recipe and leaving a comment below - I love to hear how people get on with my recipes and I truly make an effort to respond to everyone who takes the time to comment. Other recipes you might enjoy include:


Love this no add-ins version of cookies! I am going to try them this weekend!
Sometimes it's nice to have that cookie flavor shine all on it's own. I hope you enjoy them.
Love these so much! I'm not the biggest chocolate person so being able to enjoy these soft and chewy cookies without chocolate getting in the way was absolutely lovely.
I'm glad they worked out for you. I know, not everyone is a lover of chocolate 😉