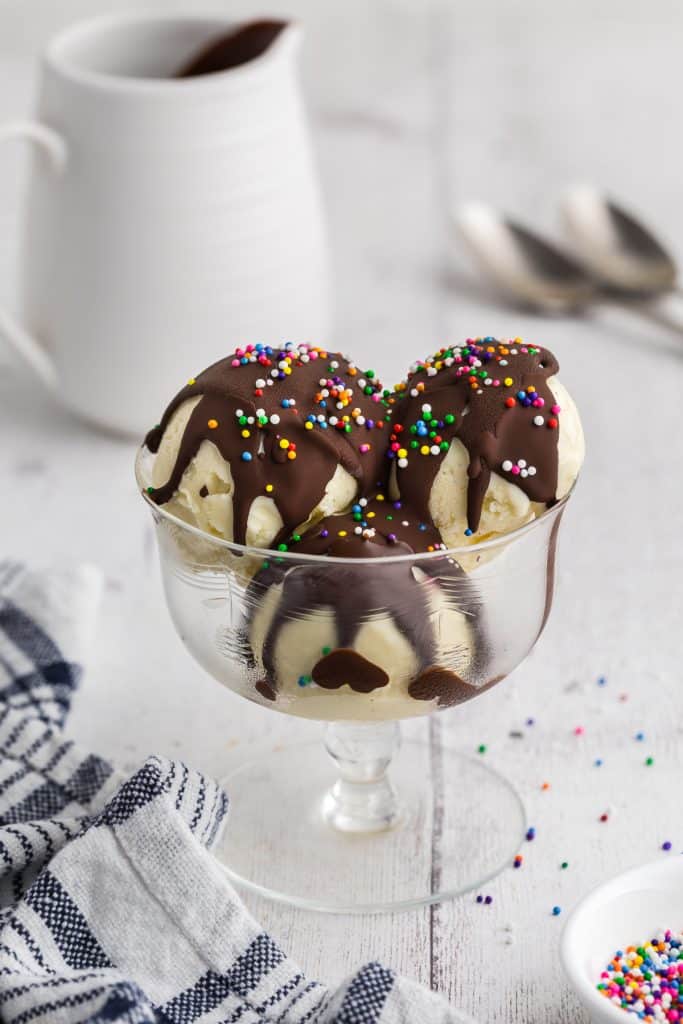
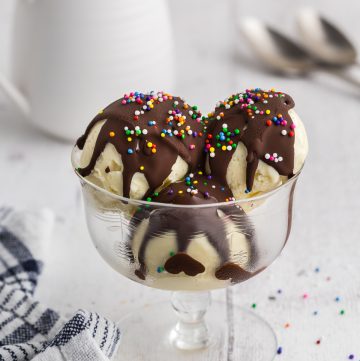
Magic Shell
There's something nostalgic about that glossy layer of chocolate that hardens instantly on contact with cold ice cream - biting into a dipped cone and feeling that satisfying snap of the chocolate. If you've ever wondered how that chocolate shell works or wanted to recreate it at home with just a two ingredients, you're in for a treat. This Chocolate Magic Shell recipe is equal parts science and indulgence, and once you try it, you'll never go back to store-bought. A fun chocolate treat that's quick and easy to make.
What's Great About Magic Shell?
A little nostalgia as I think back to getting a chocolate dipped cone at DQ. I loved that crunchy chocolate shell, and it did seem like a little magic in how they could dip ice cream into warm chocolate. Turns out it's not magic, but still fun all the same.
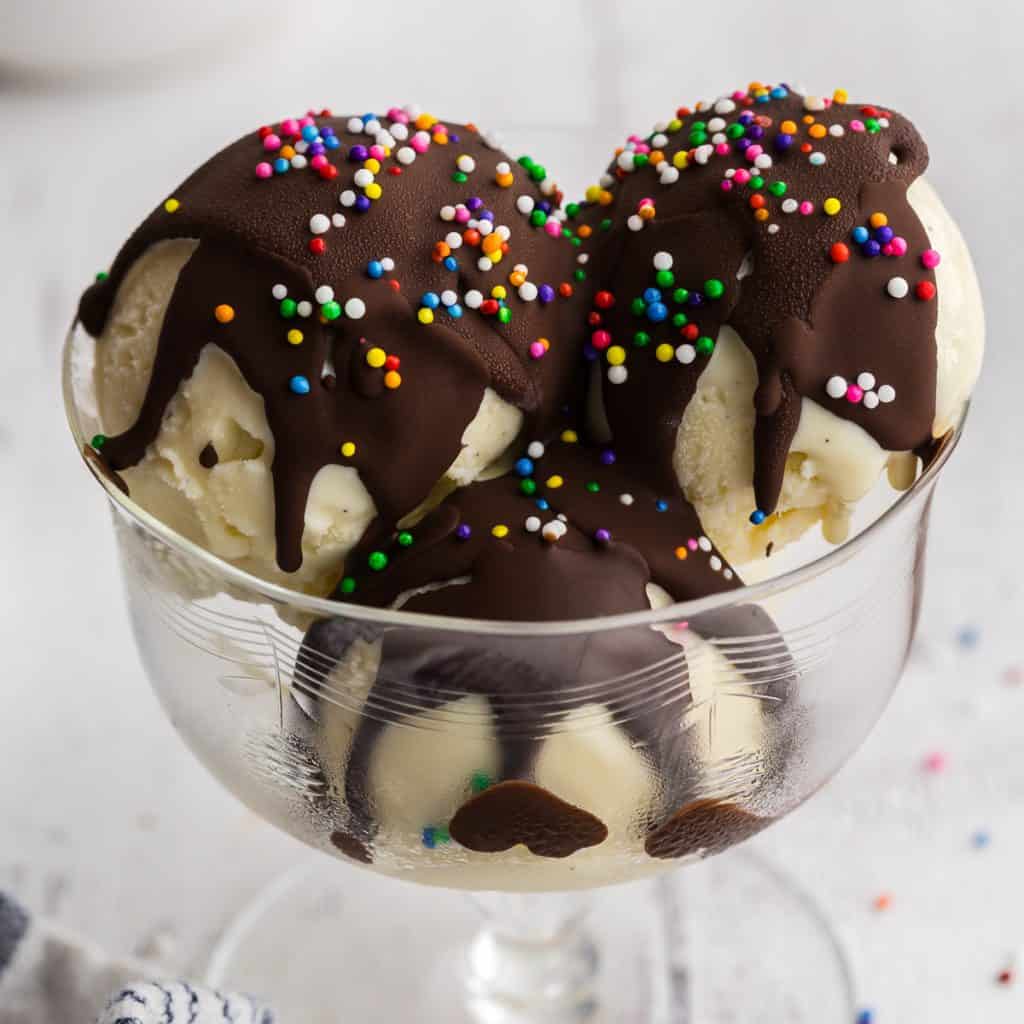
One of the key benefits of magic shell is how quickly it solidifies. Chunky toppings often struggle to stay put on a sundae, sliding down under their own weight. But when you drizzle first with magic shell and then sprinkle your chunky topping, it acts like an edible adhesive, locking the toppings in place, even along the sides of the sundae. This gives you more control over your presentation and opens up creative possibilities for decorating.
Magic shell can be made with whatever chocolate you prefer, dark, milk, and even white chocolate.
Equipment
Disclosure: as an Amazon affiliate, I receive a small amount of compensation from qualifying purchases at no expense to you. This helps support my work and allows me to bring more yummy recipes your way.
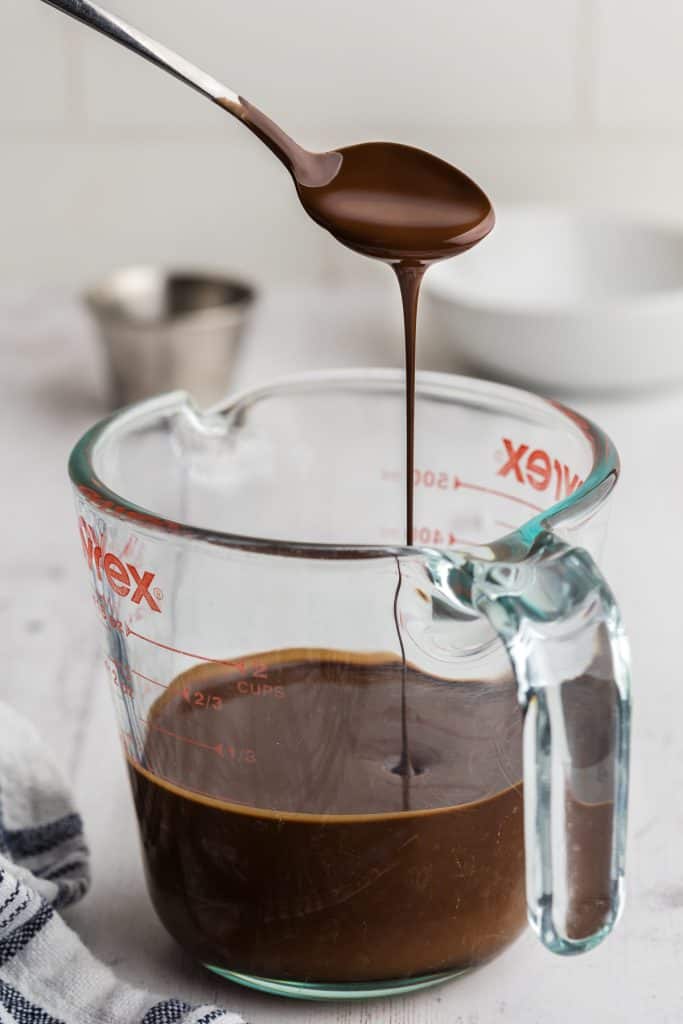
For this recipe, I melt the chocolate in a 2 cup capacity pyrex measuring cup. You could use a bowl, but if you will be dipping then it is helpful to have a tall and narrow-ish vessel allowing the chocolate to come up high on your dipping item. It's also good for pouring due to it's spout.
Ingredients
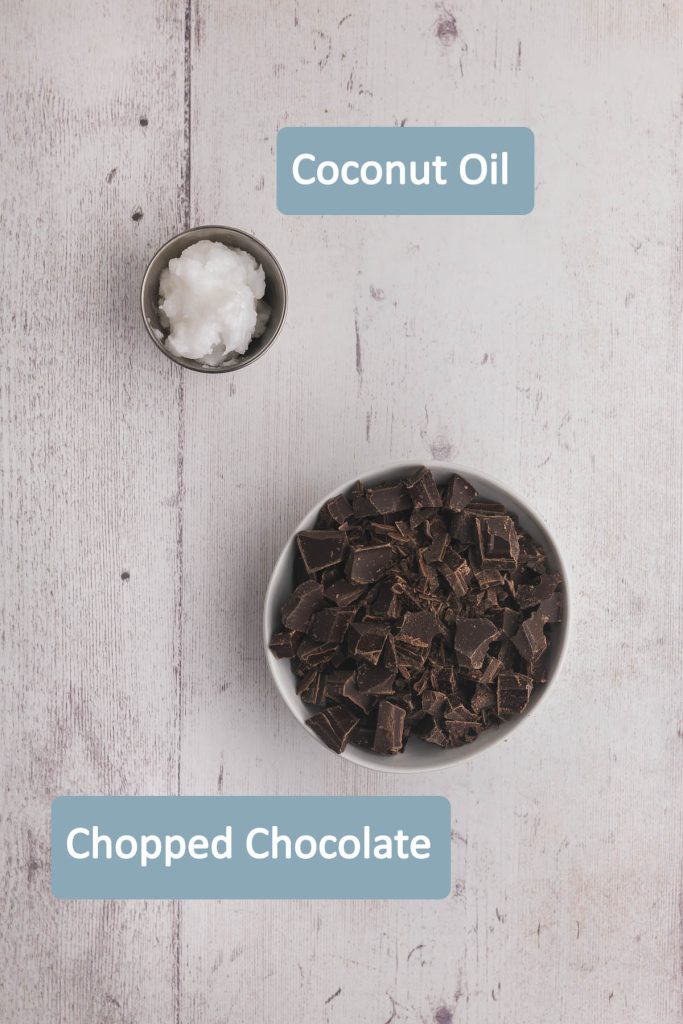
- 200g chopped chocolate of your choice (about 1 cup of chocolate chips)
- 3 tablespoons Coconut oil (measured as a solid, not a liquid)
How to Make Magic Shell
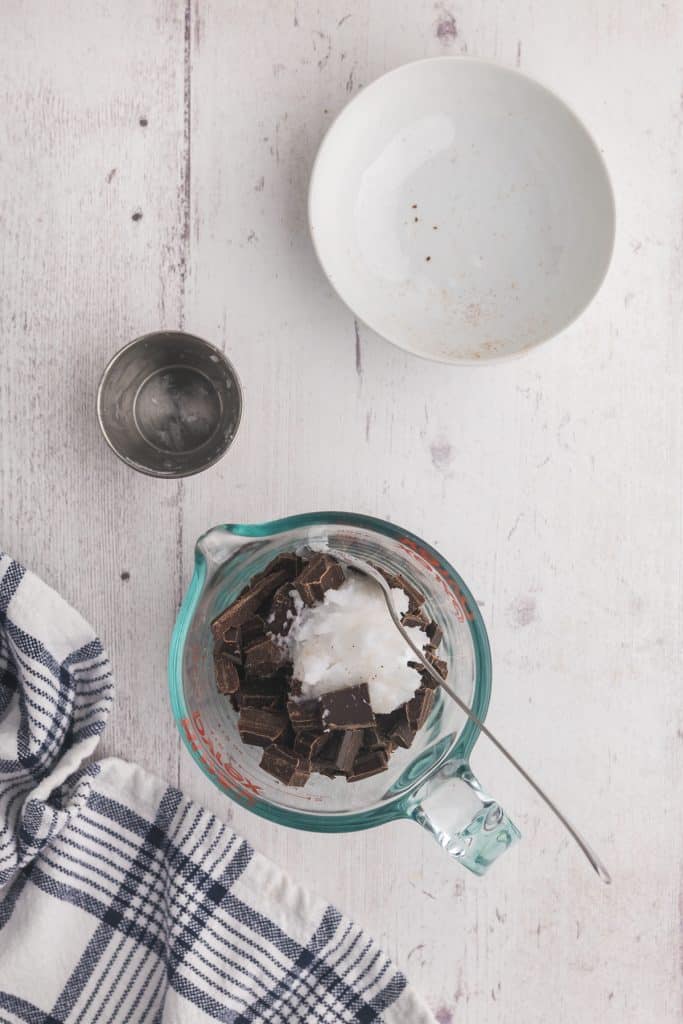
- Measure 200g of chopped chocolate into a glass pyrex measuring cup or microwaveable vessel of your choice
- Add in 3 tablespoons of coconut oil (measured as a solid, not a liquid)
- Place in microwave and microwave for 25 seconds
- Stir
- Place back in the microwave for 15 seconds
- Stir
- Place back in the microwave for 15 seconds
- Stir stir stir. See Note 1.
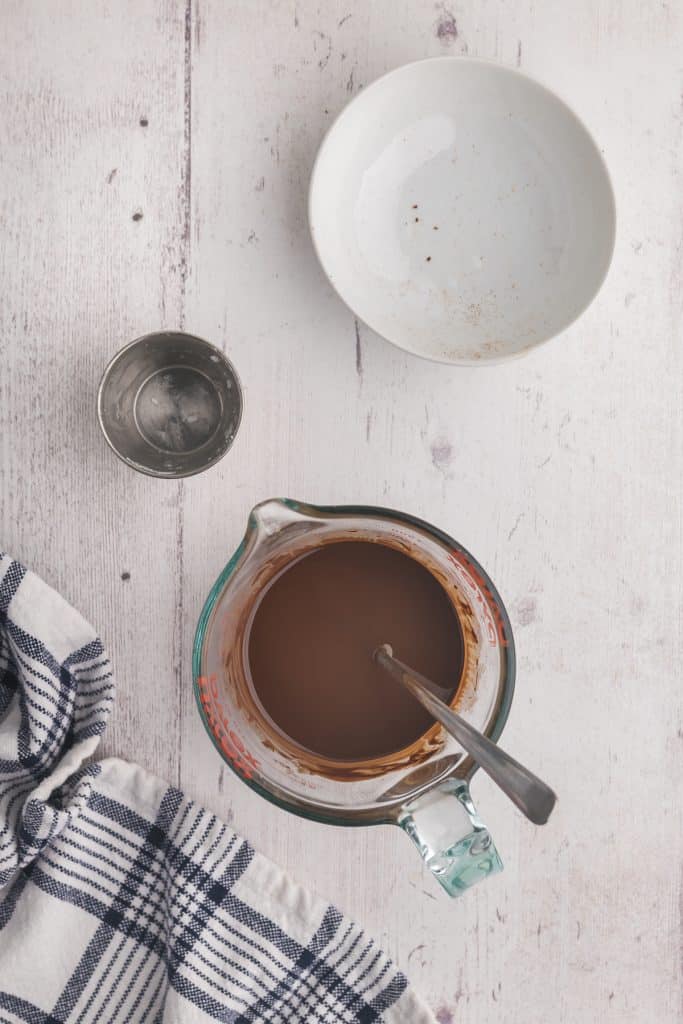
- If still not fully melted, keep microwaving for 15 seconds and stirring
- When ready, it is a fairly thin liquid.
- If the chocolate is fairly warm you can let it cool down a bit before using.
- Pour over ice cream or gelato and as it solidifies quickly, have your toppings ready to add quickly if using.
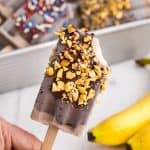
- If you are going to dip items in, like a banana popsicle, I dip the popsicle in and then use a spoon to spoon the magic shell over the undipped portion letting the chocolate drip back into the cup. Again, if rolling in toppings move quickly before it solidifies.
Notes
- You don't want to overheat the chocolate by microwaving too long. Your chocolate will separate and become grainy. If it is stir-able with chunks in it, I find it just needs more stirring. There is usually enough warmth in the liquid portion to melt the chocolate chunks, they just need stirring. So stir stir stir. But, if it still isn't melting in, then one more 15 second pulse in the microwave should do it.
FAQs
- Will the magic shell go hard at room temperature? It will depend on the temperature of the room, but yes, at about 70F (20C) the magic shell should eventually solidify. You can melt it again through microwaving and stirring as per the recipe.
- How long can I store the magic shell? It's best to cover the magic shell either in an air tight container or you could just put plastic wrap over the pyrex measuring cup and place in the fridge. It will last for 7 days in the fridge like this.
If you liked this magic shell recipe...
If you liked this recipe, please consider leaving a comment below - I love to hear how people get on with my recipes and I truly make an effort to respond to everyone who takes the time to comment. Other cold treats you might enjoy include:
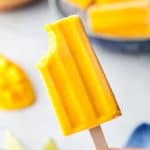
Banana Popsicles dipped in Magic Shell
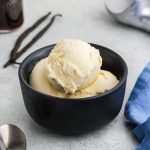
Vanilla Gelato (great topped with Magic Shell)
Magic Shell
Equipment
- 1 Glass Pyrex Measuring Cup 2 cup volume
Ingredients
- 1 cup chopped chocolate (200g)
- 3 tablespoon coconut oil
Instructions
- Measure 200g of chopped chocolate into a glass pyrex measuring cup or microwaveable vessel of your choice
- Add in 3 tablespoons of coconut oil (measured as a solid, not a liquid)
- Place in microwave and microwave for 25 seconds
- Stir
- Place back in the microwave for 15 seconds
- Stir
- Place back in the microwave for 15 seconds
- Stir stir stir See Note 1
- If still not fully melted, keep microwaving for 15 seconds and stirring
- When ready, it is a fairly thin liquid.
- If the chocolate is fairly warm you can let it cool down a bit before using.
- Pour over ice cream and as it solidifies quickly, have your toppings ready to add quickly if using.
- If you are going to dip items in, like a banana popsicle, I dip the popsicle in and then use a spoon to spoon the magic shell over the undipped portion letting the chocolate drip back into the cup. Again, if rolling in toppings move quickly before it solidifies.
Notes
- You don't want to overheat the chocolate by microwaving too long. Your chocolate will separate and become grainy. If it is stir-able with chunks in it, I find it just needs more stirring. There is usually enough warmth in the liquid portion to melt the chocolate chunks, they just need stirring. So stir stir stir. But, if it still isn't melting in, then one more 15 second pulse in the microwave should do it.


Comments
No Comments